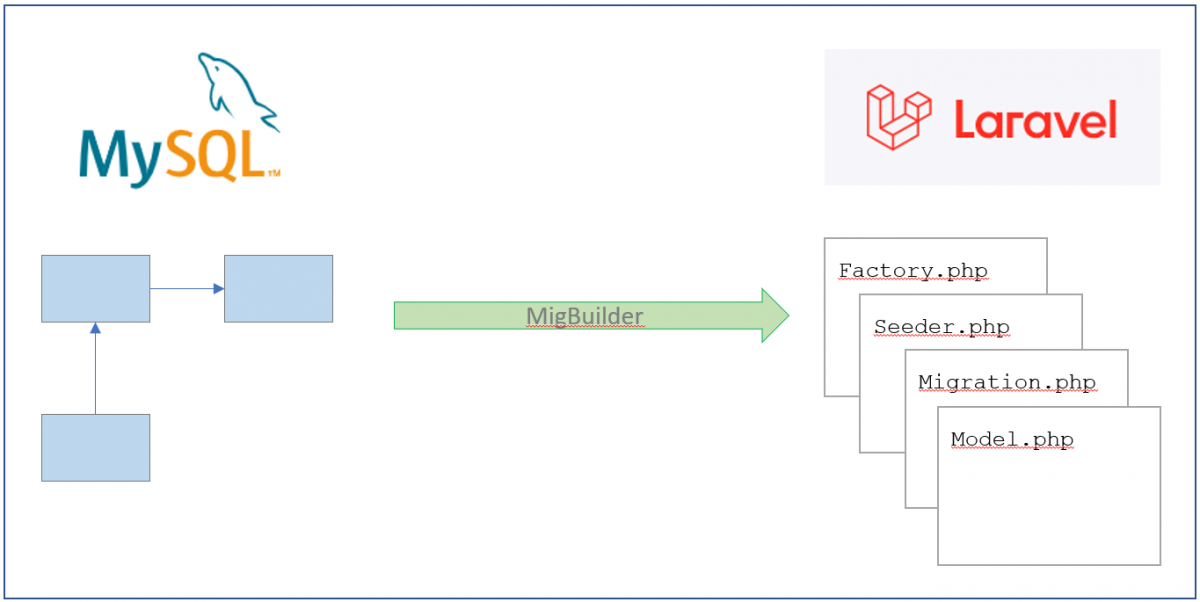
Google Earth Studio: a filming drone in your hands

I can’t stop amazing about what Google can do with data.  If you like switching to terrain view in Google Maps to look to the actual appearance of places, then you have to visit Google Earth Studio

A short promotional video is shown at the home page and the first time I saw it I thought: This can’t be real. I immediately pressed the “Try Earth Studio” button and… and nothing: you need to register and explain your reasons to try the product. I did it, but honestly I thought I would never receive their approval.

I was entirely wrong. Today I received a link to try the product, and I have to say it is amazing. 

It was a matter of minutes to make a video showing “La Puerta de Alcalá” in Madrid (where I live) from the air like being filmed by a camera drone.

The video is very simple, but what I needed to produce it was even simpler.

The only thing I didn’t like was that the platform doesn’t produce a video ready to be downloaded, but all the video frames (jpeg format) compressed in a zip file and you have to compose the video with them.

Well, if you use default options (30 fps) and you want to produce an H264 video all you have to do is:

  • Unzip the file containing the frames
  • Access the footage folder
  • Execute ffmpeg specifying these options
ffmpeg -i "videoname_%03d.jpeg" -c:v libx264 -vf fps=30 -pix_fmt yuv420p out.mp4

Of course, you’ll have to replace videoname with the prefix name of your jpeg files.

Make your WOL configuration TRULY sticky

Introduction

The typical steps to make your Ubuntu server wake on LAN are:

  • Find your network card interface name
  • Check your network card capabilities
  • Use ethtool to set “Wake-on” option to “g” value

And that’s all, then you put your server in suspend or hibernate mode and wake it up remotely. It works like a charm, but then you try a second time, you hibernate the server again and… it doesn’t wake remotely.

What happened, is that you didn’t repeat the third step to set again the “Wake-on” option to “g” value. The value you set for the network interface is volatile and you have to repeat the third step on each boot… unless you make it sticky.

Setup the network interface to work just once

1.- Find your network card interface name

sudo ip a
1: lo: <LOOPBACK,UP,LOWER_UP> mtu 65536 qdisc noqueue state UNKNOWN group default qlen 1000
    link/loopback 00:00:00:00:00:00 brd 00:00:00:00:00:00
    inet 127.0.0.1/8 scope host lo
       valid_lft forever preferred_lft forever
    inet6 ::1/128 scope host
       valid_lft forever preferred_lft forever
2: enp3s0: <NO-CARRIER,BROADCAST,MULTICAST,UP> mtu 1500 qdisc fq_codel state DOWN group default qlen 1000
    link/ether e8:94:f6:08:5a:60 brd ff:ff:ff:ff:ff:ff
3: eno1: <BROADCAST,MULTICAST,UP,LOWER_UP> mtu 1500 qdisc fq_codel state UP group default qlen 1000
    link/ether c8:9c:dc:2b:aa:48 brd ff:ff:ff:ff:ff:ff
    inet 192.168.16.126/24 brd 192.168.16.255 scope global noprefixroute eno1
       valid_lft forever preferred_lft forever
    inet6 fe80::ca9c:dcff:fe2b:aa48/64 scope link
       valid_lft forever preferred_lft forever

In my case, the server has three interfaces:

1: lo (the local loopback)

2: enp3s0: one 100Mbps ethernet card (not being used)

3: eno1: one 1Gbs ethernet card (this is the one I want to use to wake the system remotely, as it is the one configured to connect to my LAN). I will copy two values:

Interface name: eno1 (be aware of one (1) and lowercase L (l)). Usually interface name ends with a number, not a letter.

MAC address: e8:94:f6:08:5a:60

Now we know the interface name, we will check the Wake-on capabilities:

sudo ethtool eno1
Settings for eno1:
        Supported ports: [ TP ]
        Supported link modes:   10baseT/Half 10baseT/Full
                                100baseT/Half 100baseT/Full
                                1000baseT/Full
        Supported pause frame use: No
        Supports auto-negotiation: Yes
        Supported FEC modes: Not reported
        Advertised link modes:  10baseT/Half 10baseT/Full
                                100baseT/Half 100baseT/Full
                                1000baseT/Full
        Advertised pause frame use: No
        Advertised auto-negotiation: Yes
        Advertised FEC modes: Not reported
        Speed: 1000Mb/s
        Duplex: Full
        Port: Twisted Pair
        PHYAD: 1
        Transceiver: internal
        Auto-negotiation: on
        MDI-X: off (auto)
        Supports Wake-on: pumbg
        Wake-on: d
        Current message level: 0x00000007 (7)
                               drv probe link
        Link detected: yes

Take a look at the last lines. We are looking for two different lines:

Supports Wake-on: pumbg

and

Wake-on: d

The “Wake-on” mode configured by default is “d”, which means that the network card will not switch on the server when it receives a magic packet but, as the network interface supports “g” mode (it is one the letters in pumbg) we can set the value of “Wake-on” to “g”.

We will use ethtool for this. If it is not already installed on your system, do it:

sudo ethtool -s eno1 wol g

Now, if you repeat the step to check your network card capabilities (ethtool eno1) you shoud see the “Wake-on” option set to “g” value.

That means your server is ready to sleep and wake remotely.

Put the server into hibernation mode:

sudo systemctl hibernate

And now wake it remotely using one of the many available tools. Depending on the platform you will use an Android, Windows, Linux, … tool for this purpose and the only thing you will need is the MAC address you copied some steps above.

If everything went right, your server has woken, but what if you repeat the previous steps? (hibernate – remotely wake) It doesn’t work.

As I mentioned in the introduction, the value you configure in the “Wake-on” option of your network card is volatile. Each time you reboot your server it resets its value (usually to “d”).

Make your configuration sticky

We will create a system service to set the “Wake-on” value to “g” each time the server boots or restart.

There are a lot of recipes for these, but most of them didn’t work in my case. I’ll tell you one configuration line that did the trick for me.

1.- Create the .service file using your favourite editor

sudo nano /etc/systemd/system/wol.service

Now, copy the next content inside the file (change the name of the interface card and set the description you prefer):

[Unit]
Description=Activate WOL on eno1 network card
After=network-online.target

[Service]
Type=oneshot
ExecStart=/sbin/ethtool -s eno1 wol g

[Install]
WantedBy=basic.target

Save the file (^O + ENTER + ^X)

Now we will start the service for the first time

sudo service wol start

And check its status

sudo service wol status

● wol.service - Activate Wake On LAN
   Loaded: loaded (/etc/systemd/system/wol.service; enabled; vendor preset: enabled)
   Active: inactive (dead) since Sat 2020-05-09 12:55:26 CEST; 2min 8s ago
  Process: 1706 ExecStart=/sbin/ethtool -s eno1 wol g (code=exited, status=0/SUCCESS)
 Main PID: 1706 (code=exited, status=0/SUCCESS)

may 09 12:55:26 estudios-srv systemd[1]: Starting Activate Wake On LAN...
may 09 12:55:26 estudios-srv systemd[1]: wol.service: Succeeded.
may 09 12:55:26 estudios-srv systemd[1]: Started Activate Wake On LAN.

You will notice the service is dead or inactive. This is normal because it is not actually a service and it is not running like a daemon, it starts,  do whatever it has to do and finishes.

If we restart the server now, our service entry will not run at startup because we haven’t enabled it. To do so:

sudo systemctl enable wol.service

Now, you can restart the server and it will wake remotely because “Wake-on: g” should be already set when it boots.

The explanation to “TRULY sticky”

But, why did I titled my post with a “TRULY sticky”?. Well, the reason is that all the recipes I’ve found to do this didn’t work. After rebooting, always the “d” value was set for the “Wake-on” option.

In fact it is not a problem of executing the configuration or not. Although the service entry run on every reboot, it was doing it before the network card was available to be configured.

So, the problem is when to run the network card configuration.

That’s the reason you should put this line in you .service file:

After=network-online.target

To make sure it configures the network card when it’s really available.

I hope it to work for you too.

How to invoke a Qlik Sense task from Node.js

If you just want to start a Qlik Sense task from the command line using curl you shoud visit this other post

How to invoke a qlik sense task from command line

But if you need to check status after execution, get details of the task or any other entity of Qlik Sense (user, app, license, etc) then you have to use a library or package that performs all that kind of funcionality.

I wrote a simple npm package qlik-sense-qrs that can help you to write more complex scripts that will allow you to interact with Qlik Sense in a more efficient way.

The package is available at github and there you will find some basic documentation on how to install and use it.

Basically, all you will need is adding the package to your project

npm install qlik-sense-qrs --save 

Once the package and its dependencies are installed you are ready to use it.

You will need a Qlik Server certificate to authenticate to the QRS API. There are some basic directions on how to get your server certificate in the post mentioned above.

Put both files containing the certificate and the key in a secured folder to make sure only your application has access to them.

Initialization

Now you are ready to import and configure the library to access your server from your Node.js application:

const qsqrs = require('qlik-sense-qrs');

//Set an array of options
let options = {
    host: 'https://yourserver:4242/qrs',
    //Path to your server certificates
    certFile: '../../qlik/client.pem',
    certKeyFile: '../../qlik/client_key.pem'
};
//Apply defined configuration
qsqrs.config.apply(options);
console.clear();
//Show the current configuration
console.log(qsqrs.config.getConfiguration());

That is the simplest way to set the connection options: you create an object containing three mandatory parameters and pass it to the apply method of the config object.

The next two lines are optional. They just show the applied configuration to you, like this:

{
  host: 'https://yourqliksenseserver:4242/qrs',
  certFile: '../../qlik/client.pem',
  certKeyFile: '../../qlik/client_key.pem',
  xrfKey: '43f0a598891d850d',
  certPassword: ''
}

You will notice there are two more parameters that you didn’t specify: xrfKey and certPassword. Let’s explain what they are.

  • xrfKey: This is a 16 characters long string used to prevent CSFR attacks. The key will be sent in the query string and also as a header of the request. If you don’t specify a key, the library will create a random one for you, but if you want to use your own (can’t imagine a reason) all you have to do is adding it to the configuration object or invoking the specific method to set it:
qsqrs.config.setXrfKey('myownqliksense_k');
  • certPassword: when exporting your server certificate you can specify a password to improve the security. At the moment of writing this post the library hasn’t implemented this option, but probably in the next version will be available.

You can set and get any of the configuration parameters by using their corresponding method in the config object (qsqrs.config):

  • qsqrs.config.setHost(‘host url’)
  • qsqrs.config.getHost()
  • qsqrs.config.setCertFile(‘certificate file location’)
  • qsqrs.config.getCertFile()
  • qsqrs.config.setCertKeyFile(‘certificate key file location’)
  • qsqrs.config.getCertKeyFile()
  • qsqrs.config.setXrfKey(‘Your own key’)
  • qsqrs.config.getXrfKey()
Accessing the entities of Qlik Sense

There are two different types of objects in the wrapper. All of them are implemented in the entities object.

  • genericEntity: Most of the objects of QRS API have a get (list or read) endpoint and the structure of the subjacent request is the same for all of them. What the genericEntity does is receiving the name of the Qlik Sense entity as a parameter and perform the requested method. For instance, I don’t know what the odagrequest object is used for, but using the genericEntity object I can perform a call like the following and get some results:
let data = await qsqrs.entities.genericEntity.list('odagrequest');

You can check some more examples in the Github page or inside the test code.

There is an array inside generic-entity.js file that defines which objects you can invoke to:

const allowedEntities = [
    'about', 'analyticconnection', 'app', 'appavailability', 'appcomponent',
    'appcontentquota', 'appseedinfo', 'appstatus', 'binarydelete', 'binarydownload',
    'binarysyncruleevaluation', 'compositeevent', 'compositeeventoperational', 'compositeeventruleoperational',
    'contentlibrary', 'custom', 'custompropertydefinition', 'dataconnection',
    'engineservice', 'event', 'eventoperational', 'executionresult', 'executionsession',
    'extension', 'externalprogramtask', 'externalprogramtaskoperational', 'fileextension', 'fileextensionwhitelist',
    'filereference', 'health', 'license', 'licenseaccessusage', 'lock',
    'mimetype', 'odagenginegroup', 'odaglink', 'odaglinkusage', 'odagmodelgroup',
    'odagrequest', 'odagservice', 'printingservice', 'proxyservice', 'proxyservicecertificate',
    'reloadtask', 'reloadtaskoperational', 'repositoryservice', 'schedulerservice', 'schemaevent',
    'schemaeventoperational', 'selection', 'servernodeconfiguration', 'servernodeheartbeat', 'servernoderole',
    'servicecluster', 'servicestatus', 'sharedcontent', 'staticcontentreference', 'staticcontentreferencebase',
    'stream', 'syncsession', 'systeminfo', 'systemnotification', 'systemrule',
    'tag', 'task', 'taskoperational', 'tempcontent', 'user',
    'userdirectory', 'userdirectoryconnector', 'usersynctask', 'usersynctaskoperational', 'virtualproxyconfig',
];
  • task: By now, this is the only object that implements a method different of a list or read one. It implements a start method, which is the one we are naming since the first line of this post.
Putting it all together

The example below shows how to search for a task based on its name. Then, retrieve its id to invoke the task and after that it waits for 5 seconds and shows the execution result.

//Initialization
const qsqrs = require('qlik-sense-qrs');
let options = {
    host: 'https://yourserver:4242/qrs',
    //Path to your server certificates
    certFile: '../../qlik/client.pem',
    certKeyFile: '../../qlik/client_key.pem'
};
qsqrs.config.apply(options);
//End of initialization

(async() => {
    try {
        let name = 'My task name';
        console.log('Retrieve task data by name');
        let data = await qsqrs.entities.task.list(`name eq '${name}'`);
        let id = data[0].id;
        console.log(`Task id is ${id}\nStart task specifying its id`);
        data = await qsqrs.entities.task.start(id);
        console.log('Task started. Wait for 5 seconds....');
        await qsqrs.util.wait(5000);
        console.log('Retrieve task data by id');
        data = await qsqrs.entities.task.list(`id eq ${id}`);
        console.log('Show execution / progress result');
        let execData = data[0].operational.lastExecutionResult;
        console.log(`\tStatus:\t${execData.status}\n\tStart:\t${execData.startTime}\n\tStop:\t${execData.stopTime}`);
    } catch (err) {
        console.log(err);
    }
})();

Connect from Robo 3T to Atlas

A quick recipe to set the connection options in Robo 3T when accessing to an Atlas MongoDB:

1.- Reveal the connection string from Cluster Atlas console (Connect button at your cluster)

Select the “Connect your application” option and a pop-up window will open

Click on Copy button to copy the connection string.

2.- Open a new connection dialog in Robo 3T

3.- Paste the connection string you copied in step 1 into the textbox close to “From SRV” button and don’t press any button

4.- Now, replace the <password> with your actual password for the specified user

5.- Press now “From SRV” button to import the connection string settings. All the configuration parameters will be applied.

6.- Make sure SSL and SSH options are not checked.

7.- Press Test button and check that the connection works

8.- Give a name to your connection and save it

Laravel + Apache + Windows = 403 Forbidden

Just some advice to prevent “403 – Forbidden” error when loading the root page of a new fresh Laravel installation on Windows/Apache:

1.- Do not modify .htaccess file: the issue is not there.

2.- Use virtualhosts configuration in your httpd.conf file

3.- Try to keep your configuration clear and simple. Once you make it work you can add extra features.

This could be a good starting point to configure your VistualHost entry, and please pay special attention to the DirectoryIndex entry:


<VirtualHost *:80>
    DocumentRoot "/var/www/html/yoursite/public"
    DirectoryIndex index.php
    ServerName yoursite.local
    <Directory "/var/www/html/yoursite/public">
        Options Indexes FollowSymLinks
        AllowOverride All    
        Require all granted
    </Directory>
</VirtualHost>

What is Data Science?

One of the videos that more engaged me to continue and complete Coursera’s IBM Data Science Professional Certificate.
Prof. Murtaza Haider defines Data Science as “one’s attempt to work with data to find answers to questions that they are exploring

After completing a set of courses like those, you will arrive at your work the next day and then you may feel frustrated when noticing that the actual concern is not finding the answers, but making them likable even if they are not accurate and impartial.

In my opinion, before facing a Data Science / BI project you should ask yourself (or your board of directors):

  • Do you know the questions?
  • Do you have good data to work with?
  • Will you assume the answers though you don’t like them? (my fav)

How to invoke a Qlik Sense task from the command line

If you use Qlik Sense, eventually you will need to automate the execution of the data loading tasks.

Qlik Sense implements a REST API to make this and much more things. It is called Qlik Sense Repository Service API or QRS API

There are several ways to authenticate our calls to the server. Here we will use a server certificate instead of Windows or HTTP Header Authentication.

To export the server certificates, we need to access the QMC console with admin privileges. Once you are logged into the QMC, click in the last option on the left menu “Certificates”.

Exporting Qlik Sense server certificatesYou will need to enter a machine name and also a password if you want to protect your certificate. Remember, if you don’t specify a password, anyone who has access to the certificate file will have the capabilities of an admin via the Qlik Sense API.

Change the file format of the certificate to .pem and note the location where the .zip file that contains the certificates will be saved.

If you go now to the folder mentioned above and everything went ok, you will find a zip file. Unzip the file and copy both files inside (client.pem & client_key.pem) into a safe folder or an usb pen that we will reference later. 

Now, let’s go to our Linux station to create the utility script that we can use to start Qlik Sense tasks.

Of course, the Qlik Sense server has to be accessible from this station.

1.- Create a folder to store both the script and the certificate files

mkdir /opt/qliktasks

2.- Access the new folder and create a new one to store the certificate files

cd /opt/qliktasks

mkdir cert

3.- Copy the cert files from your usb device or the folder where you stored them before. Once you’ve finished, there should be two files inside the cert folder you created in step 2.

/opt/qliqtasks/cert/client.pem

/opt/qliqtasks/cert/client_key.pem

4.- Now, let’s create the sh script:

4.1.- Inside /op/qliktasks folder open nano or vim to create the file taskStart.sh

nano taskStart.sh

4.2.- Make up a 16 characters long key that you will specify later in the query string and a header of the curl request. For instance:

MySixteenLongKey

1234567890123456

4.3- Copy the following content inside the file updating the files path and the 16 long key. This is a very important step because the files need to be specified with an absolute path.

#!/bin/bash

curl --key /opt/qliqtasks/cert/client_key.pem \
--cert /opt/qliqtasks/cert/client.pem \
--insecure \
-X POST \
https://myserver.intra.net:4242/qrs/task/$1/start?xrfkey=MySixteenLongKey \
--header "Content-type:application/json" \
--header "x-qlik-xrfkey: MySixteenLongKey" \
--header "X-Qlik-User: UserDirectory=internal;UserId=sa_repository" \
-d ""

4.4.- Save the file (CTRL + O), confirm and exit (CTRL + X) the editor

4.5.- Activate execution flag

chmod +x startTask.sh

5.- Now we are ready to execute a Qlik Sense task by specifying its UUID.

./startTask.sh e12ed06d-9124-4772-a07d-60cc06f05521

How to find the task UUID?

Go to QMC tasks panel and find the column menu in the top right corner. Simply activate the ID checkbox and copy from the new column the UUID of the task you need to invoke.

Qlik Sense Task Column Menu

SQL scripts to close Redmine solved issues

Redmine is probably the best open source ticketing application. We have been using it for some years and had no problem at all.

Though you can define your own workflows and status transitions I miss a feature: automatically closing issues that have been solved during a certain number of days.

There exists a plugin to do so, but if you don’t want to deploy third-party plugins or you just want to customize the way you close the issues, here you have a couple of MySQL Scripts to automate this task (you can program a cron entry for that).

The first script retrieves all the issues ids that have been in solved status during more than the specified number of days

CREATE DEFINER=`root`@`%` PROCEDURE `sp_close_resolved_redmine`(
IN `in_days` INT
)
LANGUAGE SQL
NOT DETERMINISTIC
CONTAINS SQL
SQL SECURITY DEFINER
COMMENT ''
BEGIN
    declare v_id integer;
    declare v_finished bool;
    declare res_issues cursor for
    SELECT id
    FROM redmine.issues
    WHERE status_id = 3
    AND TIMESTAMPDIFF(DAY, updated_on, CURRENT_TIMESTAMP) > in_days;
    declare continue handler for not found set v_finished = true;

    open res_issues;
    res_issues: loop
        fetch res_issues into v_id;
        if v_finished = true then
            leave res_issues;
        end if;
        call sp_cierra_issue_redmine(v_id);
    end loop res_issues;
    close res_issues;
END

The second script is invoked by the one above passing the issue id to be closed

CREATE DEFINER=`root`@`%` PROCEDURE `sp_cierra_issue_redmine`(
                IN `in_id` INT
)
LANGUAGE SQL
NOT DETERMINISTIC
CONTAINS SQL
SQL SECURITY DEFINER
COMMENT ''
BEGIN
    declare v_id            integer;
    declare v_author_id     integer;
    declare v_assigned_to   integer;
    declare v_status        integer;
    declare v_id_journal    integer;               

    select author_id, assigned_to_id, status_id into v_author_id, v_assigned_to, v_status
      from redmine.issues
     where id = in_id;

    #Update issue status and assign to author
    update redmine.issues
       set assigned_to_id = v_author_id,
           status_id = 5,
           updated_on = current_timestamp,
           closed_on = current_timestamp
     where id = in_id;
     
    #Create a new journal for the issue
    insert into redmine.journals (journalized_id, journalized_type, user_id, notes, created_on)
                          values (in_id, 'Issue', 1, 'Automatically closed after 7 days solved', current_timestamp);  
    
    #Get the journal id we have just inserted
    select max(id) into v_id_journal
      from redmine.journals
     where id = in_id;
    
    #Create two new entries in journal details, one for assigned_id and another one for status_id
    insert into redmine.journal_details (journal_id, property, prop_key, old_value, `value`)
                                 values (v_id_journal, 'attr', 'assigned_to_id', v_assigned_to, v_author_id);     

    insert into redmine.journal_details (journal_id, property, prop_key, old_value, `value`)
                                 values (v_id_journal, 'attr', 'status_id', v_status, 5);     
END