Since I bought my Ender 3 I have been looking for a hairspray with the minimum odor. I hate the cheap perfume smell floating around in the room where I make things.
I first try the most famous 3D printing hairspray in Spain: Nelly. It doesn’t smell too much, but it does.
A second try was for Mercadona’s “Fuerte” one. It smells better and adhesion is quite good.
I felt very good with this last one, but after some more printings… the room smells like a granny hairstyle contest.
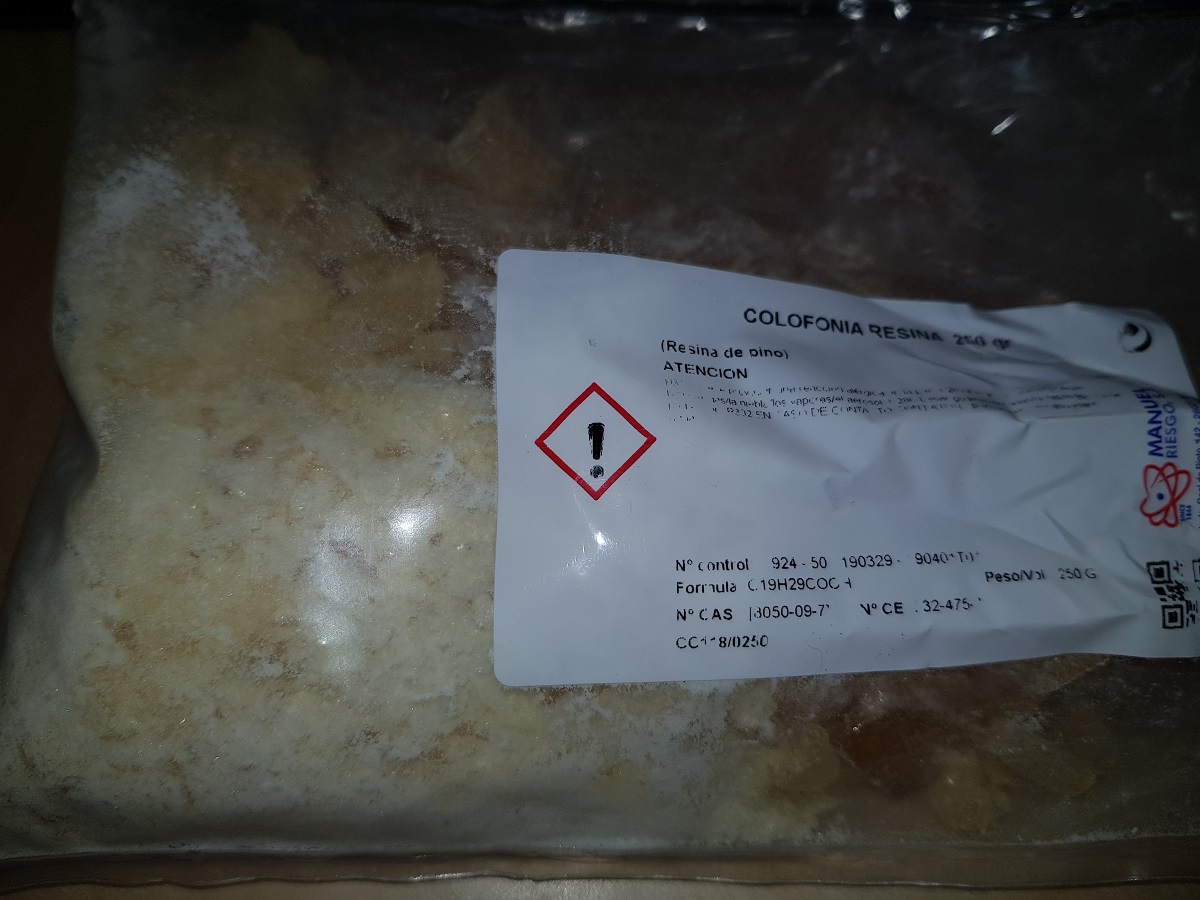
After thinking a lot on it I found a solution. Some years ago I played with pine resin to make a homemade soldering paste. Though the results where satisfying, I stopped using that substance because once diluted in alcohol, when the dissolvent evaporates it remains a surface extremely sticky. That is exactly what I want now for my printing bed: a sticky surface.
Pine resineFinished adherence improver
Today I’ve tried the first formulation with very good results:
Ingredients:
50 grams of Ethylic Alcohol
3 grams of pine resin
The recipe is quite simple. All you have to do is follow the next steps:
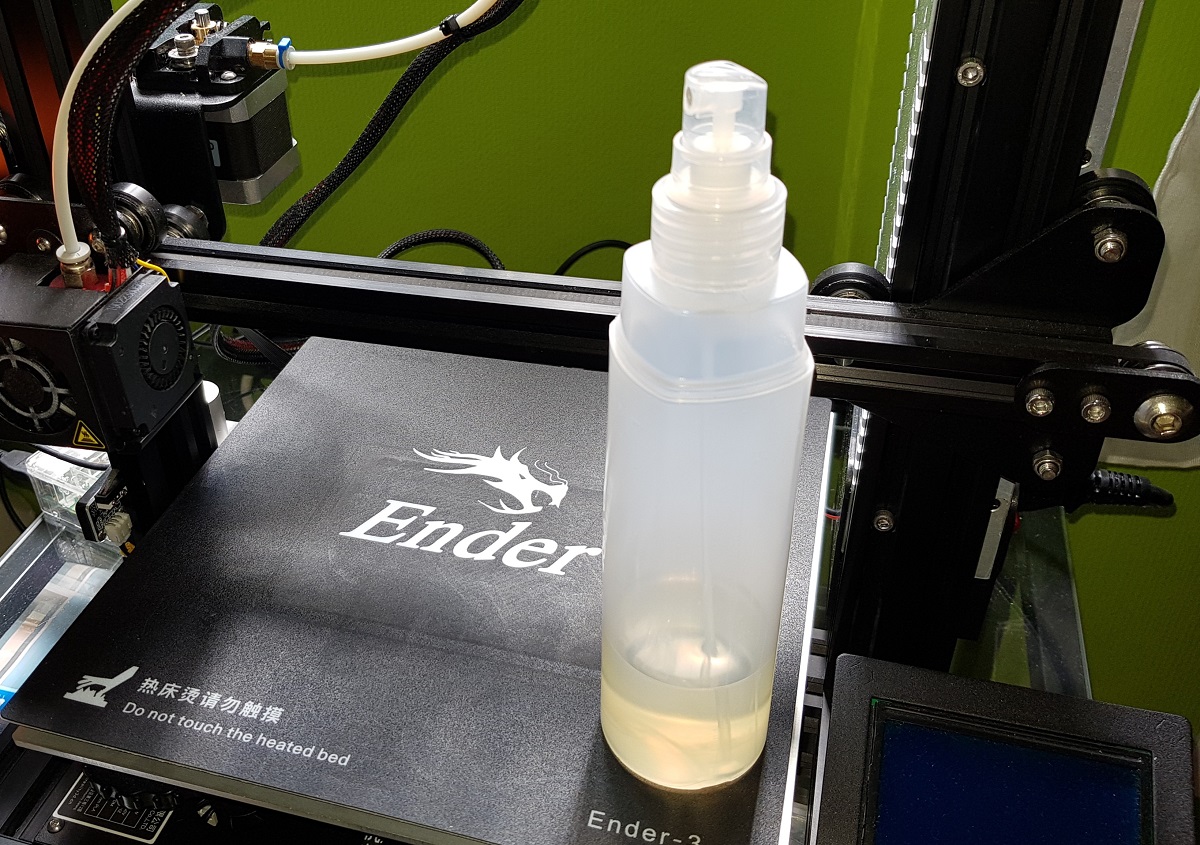
Make powder a couple of resin stones (1cm side each one).
Pour the powder and the alcohol in a small bottle, close it and stir until the resin dissolves completely.
It’s done.
Put the resulting liquid into a spray bottle and you have a ready to use adherence improver that doesn’t smell at all.
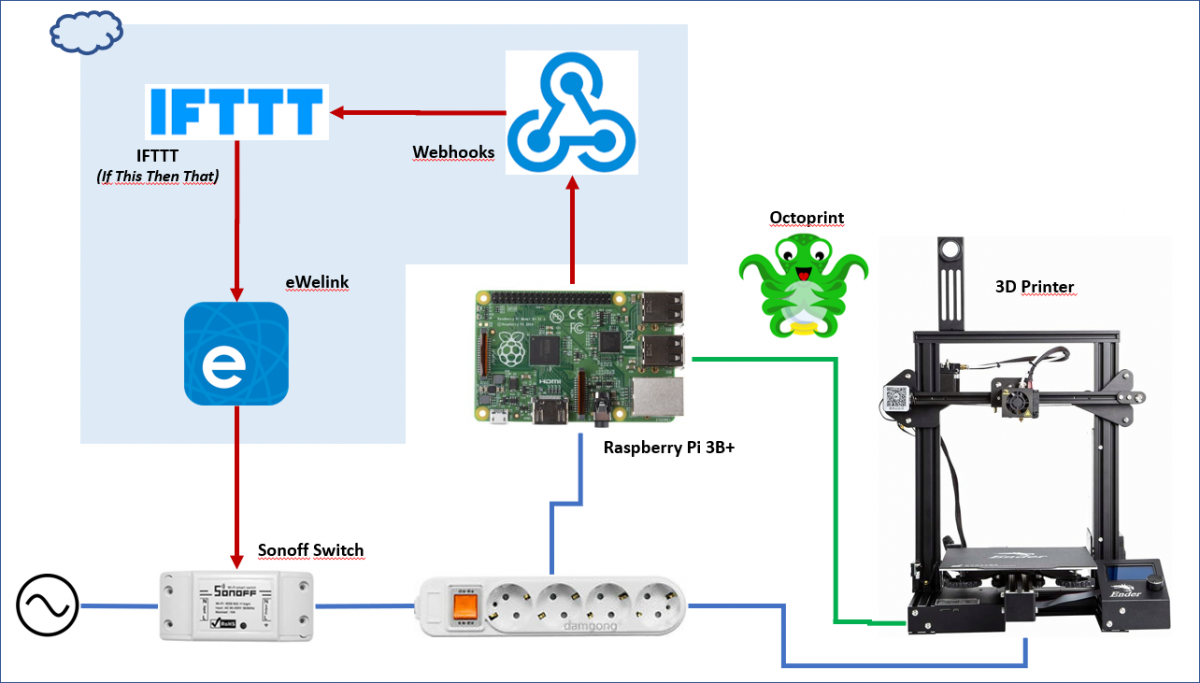
Some 3D print jobs may take hours to finish. When printing to an Ender 3 (and I guess there are other printer models with the same issue) even if the job has finished, the printer stays on and the power module fans continue running. If this happens during night hours, it means a noise that we can avoid easily.
We have a lot of possibilities to achieve our goal, but I don’t want to plug any wire to the Raspi GPIO to control a relay board. I instead used a Sonoff Switch to control a standard multiplug.
We will cover only the switching solution assuming that you have already your Octoprint system connected to your printer and working.
The solution will perform the next steps to switch off the printer and the Raspi:
The printing job will run as usual.
When the job is completed, Octoprint will check for any event listener already configured (in config.yaml file)
Our event configuration will trigger a system command consisting of a Wget to contact to Webhools
Webhooks will notify IFTTT about the finished printing job
IFTTT will take into account (with a programmed filter) the time when the event occurs to switch off (or not) the Sonoff Switch
IFTTT will send a message to eWelink platform to switch off the device
eWelink platform will tell our device to switch off
Though it seems there is a lot of work to do, you’ll see it’s quite easy to set up everything and most of the steps are performed in the background by IFTTT platform.
List of components
IFTTT account: you can use your Google account to log in
This step is quite easy. All you have to do is cutting the multiplug wire to insert the Sonoff switch in it. Be aware that Sonoff switch has an input and an output.
There are a bunch of videos and tutorials about how to do this.
2.- Set up your Sonoff Switch
Use the app installed on your Android phone to set up the switch. Just to clarify how the Sonoff switch works take into account these next points:
The switch connects to your Wifi router:
All the communication occurs between the switch and eWelink server. You cannot (unless you reprogram the switch board) communicate directly to it through your LAN.
To set up the switch using its App, you have to be connected to the same Wifi network at the moment of setup. This point is very important because you may have two wifi networks at home (one for 2.4GHz devices and another one for 5GHz) and probably you connect your mobile to 5GHz one. If you don’t connect to 2.4GHz at the moment you configure your switch you will be telling your device to connect the network you are in and it will not be able to connect to that 5GHz wifi. It is only capable to connect to 2.4GHz AP, so please before configuring the device connect your mobile to your 2.4GHz wifi AP. This is only for during setup process. Once the device is configured you can return your mobile to your 5GHz wifi.
Once the Sonoff device is configured, you have several alternatives to switch it on/off:
Using eWelink App
Using Google Assistant
Using IFTTT (If This Then That) platform. And this will be our choice for this solution.
Just in case you have any issue while reproducing the activation steps shown in the video, here you have the official link to the eWelink setup process.
At this point, you should be able to switch on/off your device by using eWelink App on your Android phone. If you are not, please do not continue beyond this point and review all the configurations.
3.- IFTTT Applet Set up
Now you have your device reachable in the cloud it’s the moment to create an applet in IFTTT. You will use a free account and some of the characteristics of your applet are premium, so you will be limited and you will not be able to publish your applet for others and it will just be available for you. That’s no problem at all.
Log into IFTTT with your account (or even better use your Google one) and then follow the steps shown in the next video:
The applet is now available and you can invoke it in two different ways:
A GET request: from any browser, CURL, WGET, etc
A POST request: and optionally specifying a JSON body with additional data (a security token for instance)
We will use the first option now.
The first thing is to find the key to invoke Webhooks. That key is generated automatically by the platform and it can be easily changed on demand.
To find it, follow the steps shown in the video, then copy it down:
So, at this point, we have everything to invoke our applet:
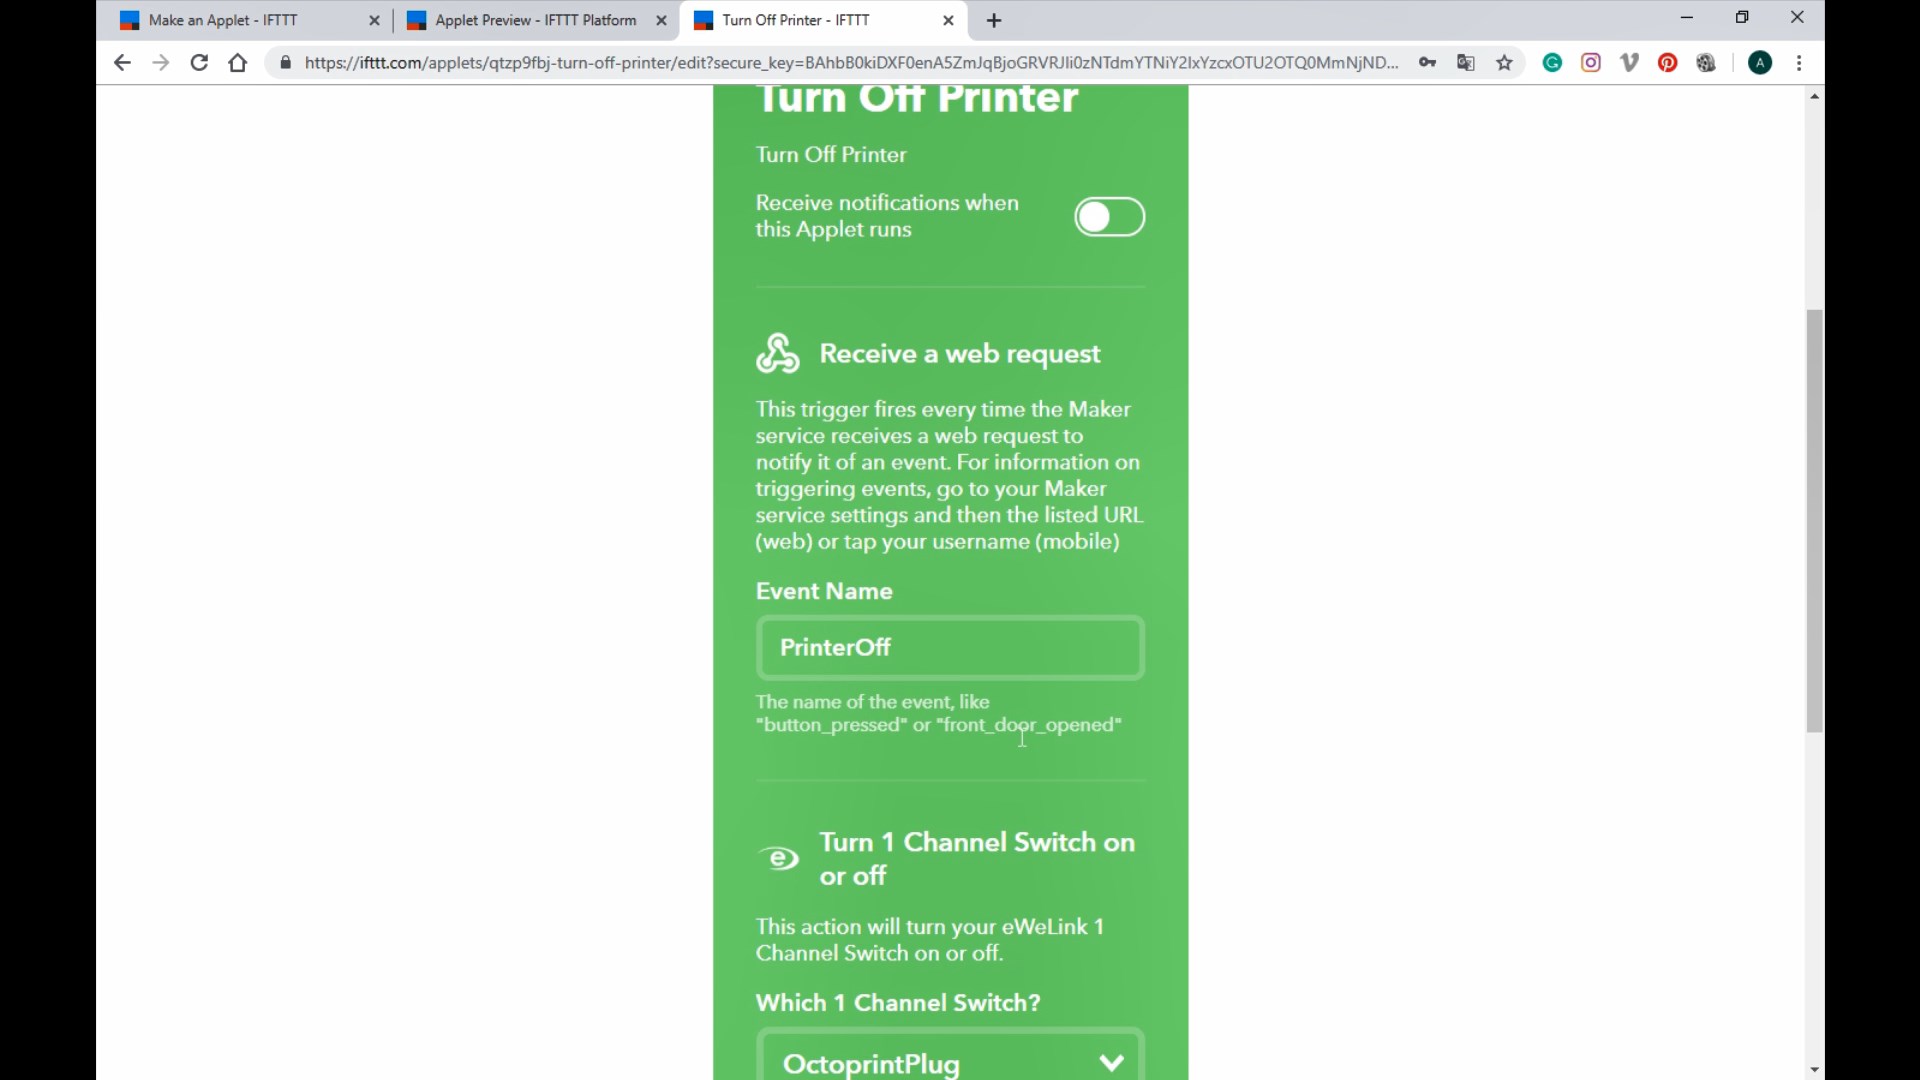
Event Name: PrinterOff
Webhooks Key: your_webhooks_account_key
Remember the Event Name is not the Applet Name, but the name you specified when you activated the applet:
Replace the key with the value assigned to your account, copy the full URL and paste it on any browser.
If everything goes right you will receive a reply like this
Congratulations! You've fired the PrinterOff event
Change the key value and the response will be an error, but take care because if you change the event name, though it doesn’t exist, it will reply with a success message. So, if you see everything seems to work but the applet seems to be not invoked review the event name in the URL.
4.- Add two applets to control the printer manually (OPTIONAL)
We have an applet that we will use to switch off our printer from Octoprint when a print job is done, but we need to use the eWelink application to switch on/off the printer.
To make things easier, we can add two more applets. Do not modify the one we’ve just created as we will use it after.
Following the shown steps in two videos above, create and activate these two applets:
Applet 1:
On New applet screen
Trigger: Webhooks
Applet Name: ManPrinterOn
Applet Description: Manually switch on the 3D printer
Action: eWeLink
On Enabling Screen
Event Name: ManPrinterOn
Which channel: yourDeviceName
On/Off: ON
Applet 2:
On New applet screen
Trigger: Webhooks
Applet Name: ManPrinterOff
Applet Description: Manually switch off the 3D printer
Action: eWeLink
On Enabling Screen
Event Name: ManPrinterOff
Which channel: yourDeviceName
On/Off: OFF
With our two new applets, we can switch on/off our printer from any browser. To make this task easier, we will create two batch files (if you are a Linux user it will be easy to transform the Windows .bat files)
Install Wget for Windows. The easiest way is to download the installer from SourceForge: Wget for Windows
Create a folder inside your user folder named scripts.
Create two .bat files inside the scripts folder and adapt the content of the files to your Ids, Keys, etc.
echo off
wget https://maker.ifttt.com/trigger/YOUR_EVENT_NAME/with/key/YOUR_WEBHOOKS_KEY -O /dev/null
Both files are the same thing when invoking IFTTT platform and just change the event name (to switch on or off), but the first file, additionally will wait for 45 seconds and open a Chrome instance with the Octoprint URL. Change this to adapt to your configuration or simply remove these lines if you don’t want Octoprint to be invoked automatically when switching on your printer.
Add to direct links to these files to your desktop and all you have to do to switch on or off your printer is double-click on them.
5.- Make applet conditioned to time
Probably you will want your system not turning off each time a print job is finished. Imagine you want to send two or more short jobs to your printer manually.
To prevent this from happening we are going to make our Applet conditioned to time using the Filtering capabilities of IFTTT. This is the premium feature I told you before, but you can use it for your own Applets (you cannot publish them to be used by others).
Coding a filter for an IFTTT Applet is quite easy. It uses Javascript and standard libraries.
To implement our filter all you have to do is deciding what time do you consider the limit when the printer should be turned off automatically. In my case, I chose between 23:00h and 08:00h, because I never print something beyond that time and wait for it to finish.
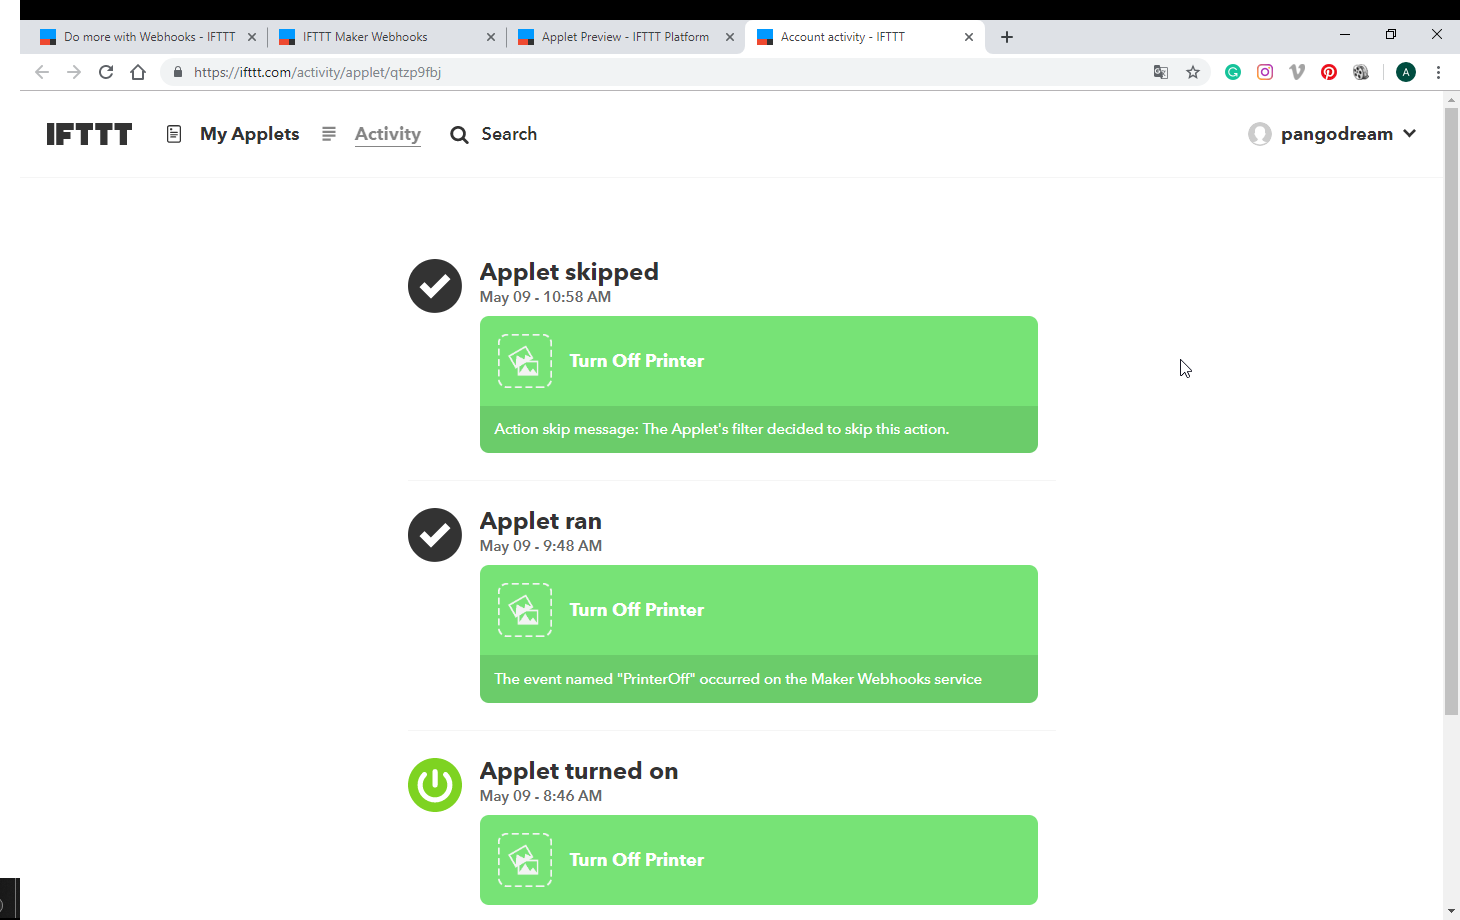
Here you have a video showing the necessary steps and how to reach the Logging Screen to check if your applet is running ok. Take note that the video doesn’t show exactly the same code as the one mentioned above.
Now, if you invoke your applet from a browser and the limit time you configured in the code has not been reached, the applet execution should be skipped. You can check it in the logging screen and may show something like this:
IFTTT Applet event skipped
6.- Configure event in Octoprint
We need to tell Octoprint what to do when a PrintDone event occurs.
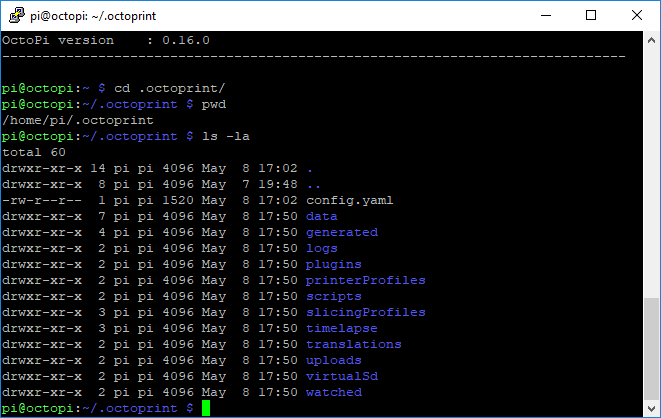
Locate the config.yaml file on your Octoprint installation. If you are using a Raspberry Pi it will probably be here:
Octoprint config.yaml file
Edit the configuration file using your favorite editor and add the following lines to the end of the file.
Replace YOUR_EVENT_NAME and YOUR_WEBHOOKS_KEY with the correct values you obtained in previous steps.
Now, when Octoprint finishes a job, it will invoke your IFTTT Applet and if it occurs after the time you configured in the Applet filtering it will switch off your printer and Raspi.
Two days ago I deployed an Octoprint system for my Ender 3. Octoprint is the leading application for remote controlling 3D printers. It needs to be deployed on a host connected to the 3D printer and takes control of everything, allowing you to interact with your printer remotely (web or app).
I have in mind a very less ambitious project consisting of an ESP32 combined to a USB host shield that will allow checking the printer status for less than 10€, but I am still waiting for some parts to arrive from China and of course, it has nothing to do with Octoprint.
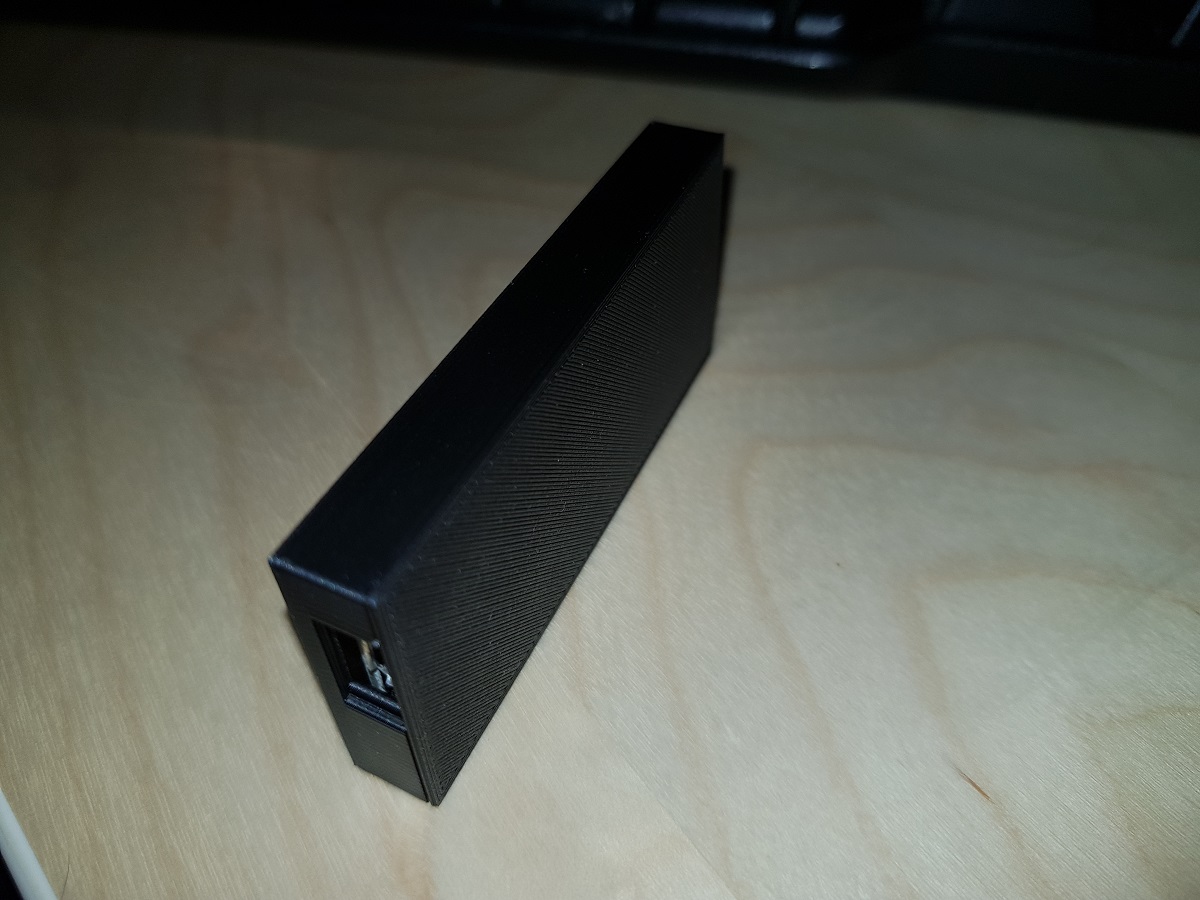
One of the most attractive features of Octoprint is the possibility to connect a webcam to the system so that you can see what’s really happening to your printed piece.
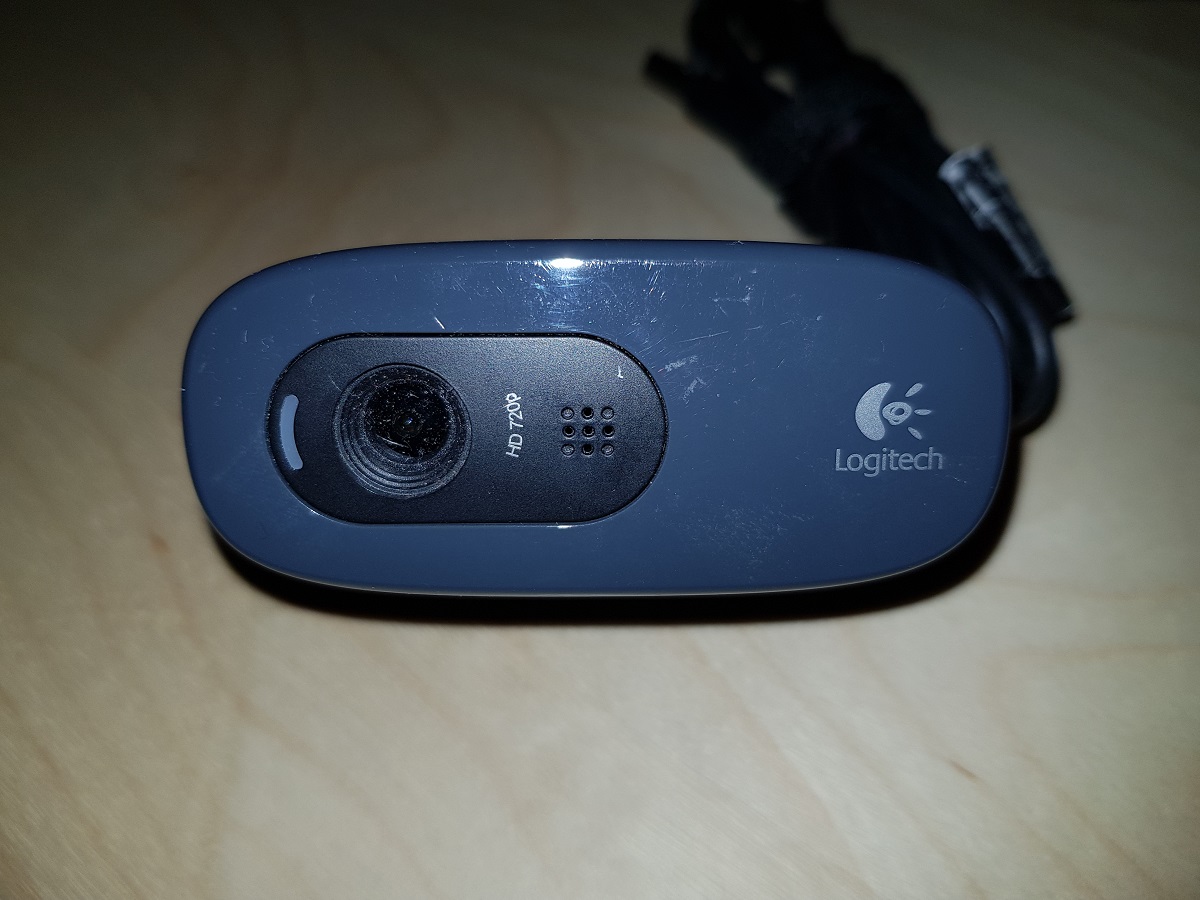
I had a Logitech C270 forgotten in a drawer, so I decided to use it for my printer. I tried to hang it from the upper crossbar, but the printing vibrations made it quite unstable. I also used a tripod, but it makes no sense to set up a tripod each time you print something.
Logitech C270 Webcam
Transforming a Logitech Webcam into an Ender 3 Webcam
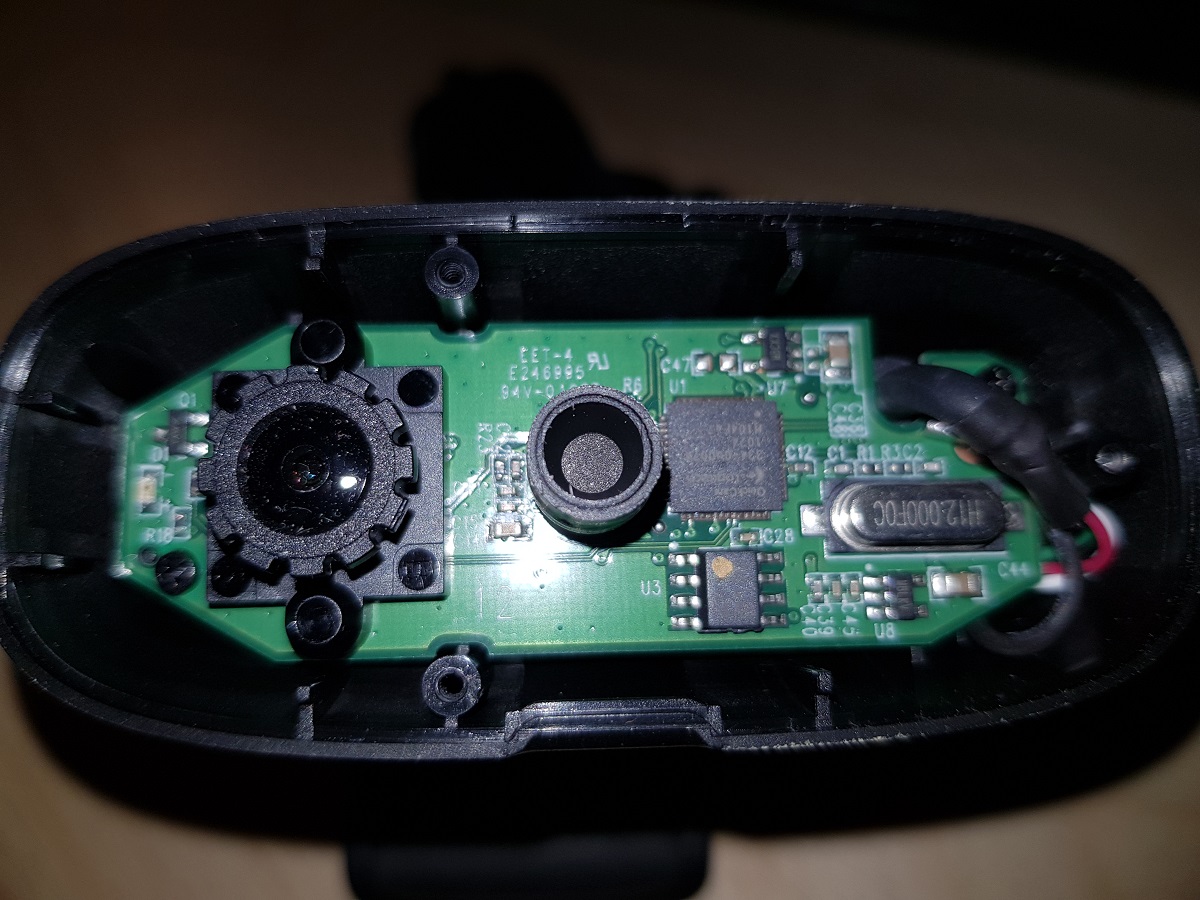
I opened the webcam to measure the internal pieces in order to design a new case for them. The cam consisted only of a tiny board with a focusable camera lens attached to it. This was a good surprise for me because, though the Logitech C270 is a quite good camera, the focus distance is fixed a bit further than the required for the printer and if I can adjust the focus distance it will be much better.
Inside Logitech C270 (note the adjustable lenses)
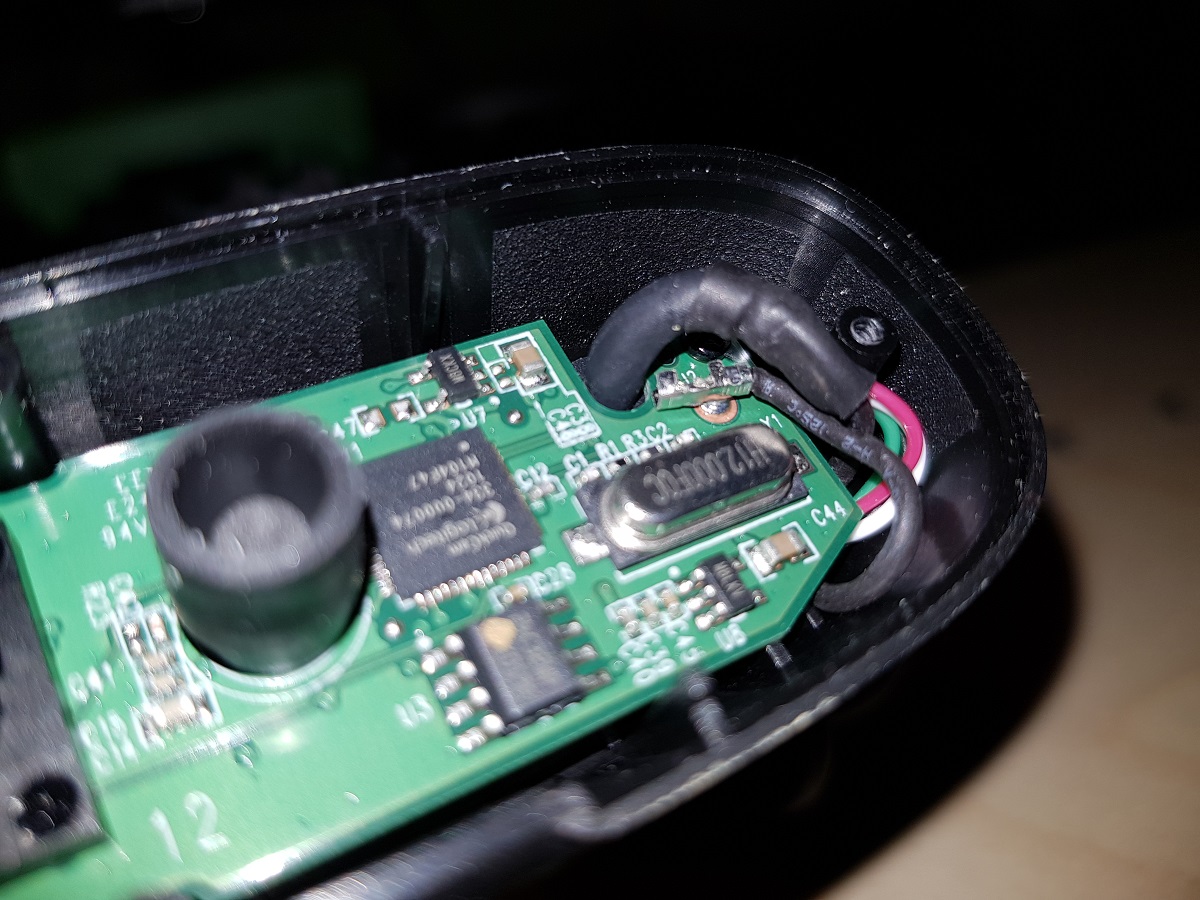
To avoid breaking the original case, I had to desolder a wire.
Logitech C270 Wire to be desoldered
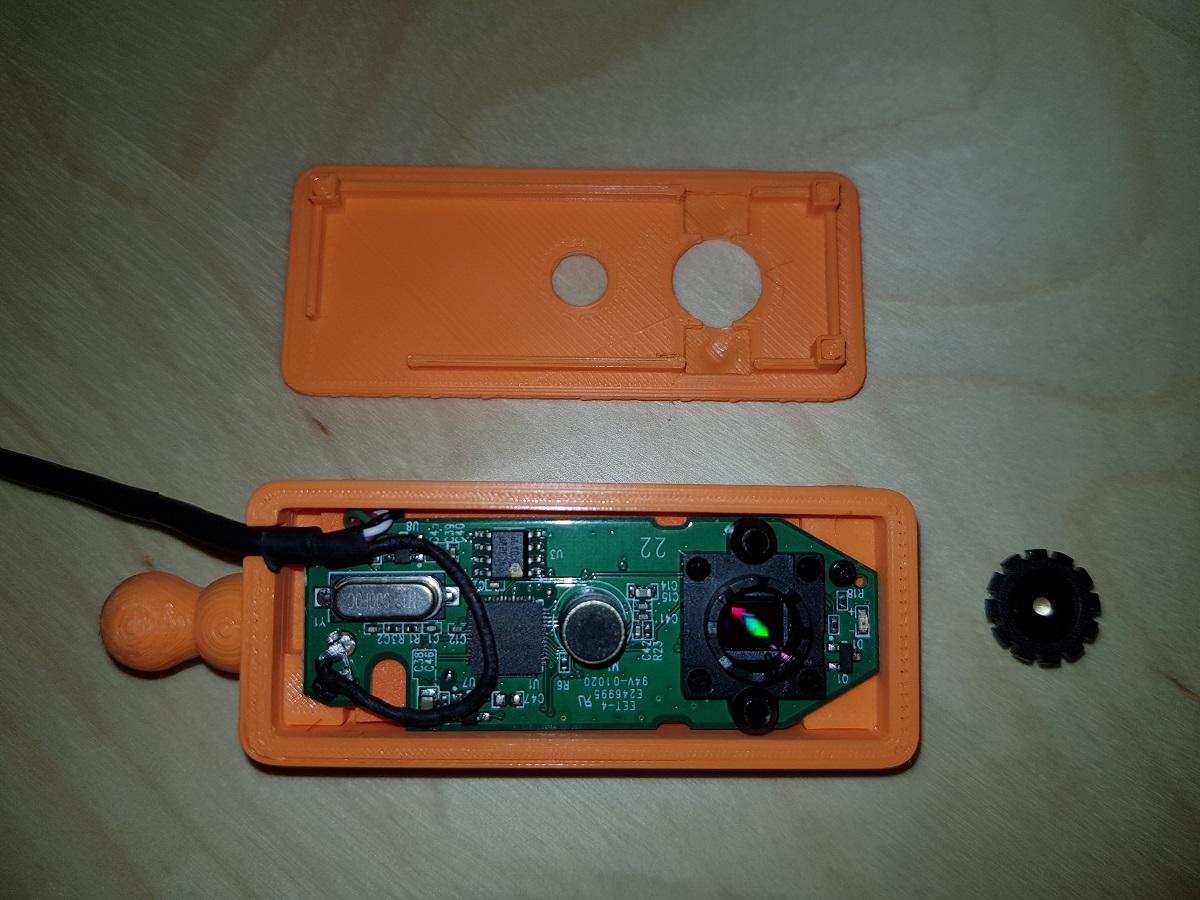
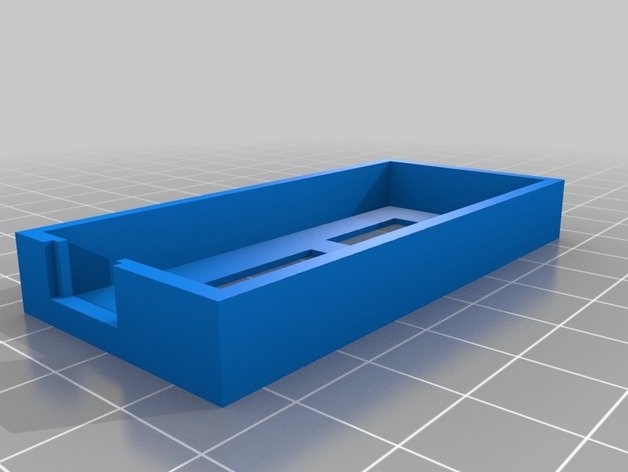
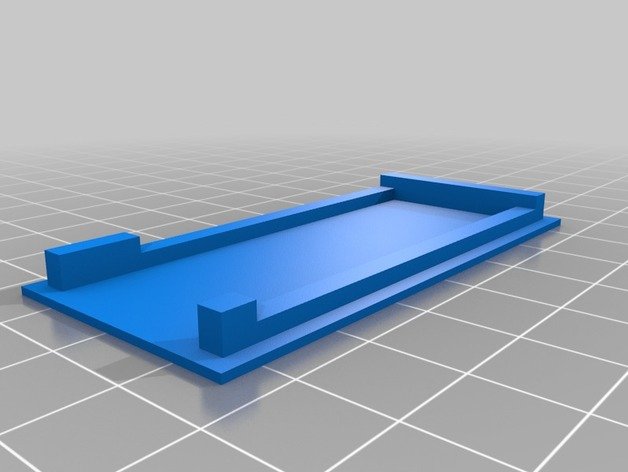
After measuring the board, I designed a box as thin as possible and mounted the board inside it.
Inside Ender 3 Webcam
The complete system consists of a box for the cam, a bone, and a base:
Assembling webcam to the boneBoneEnder 3 Webcam baseEnder 3 WebcamEnder 3 Webcam
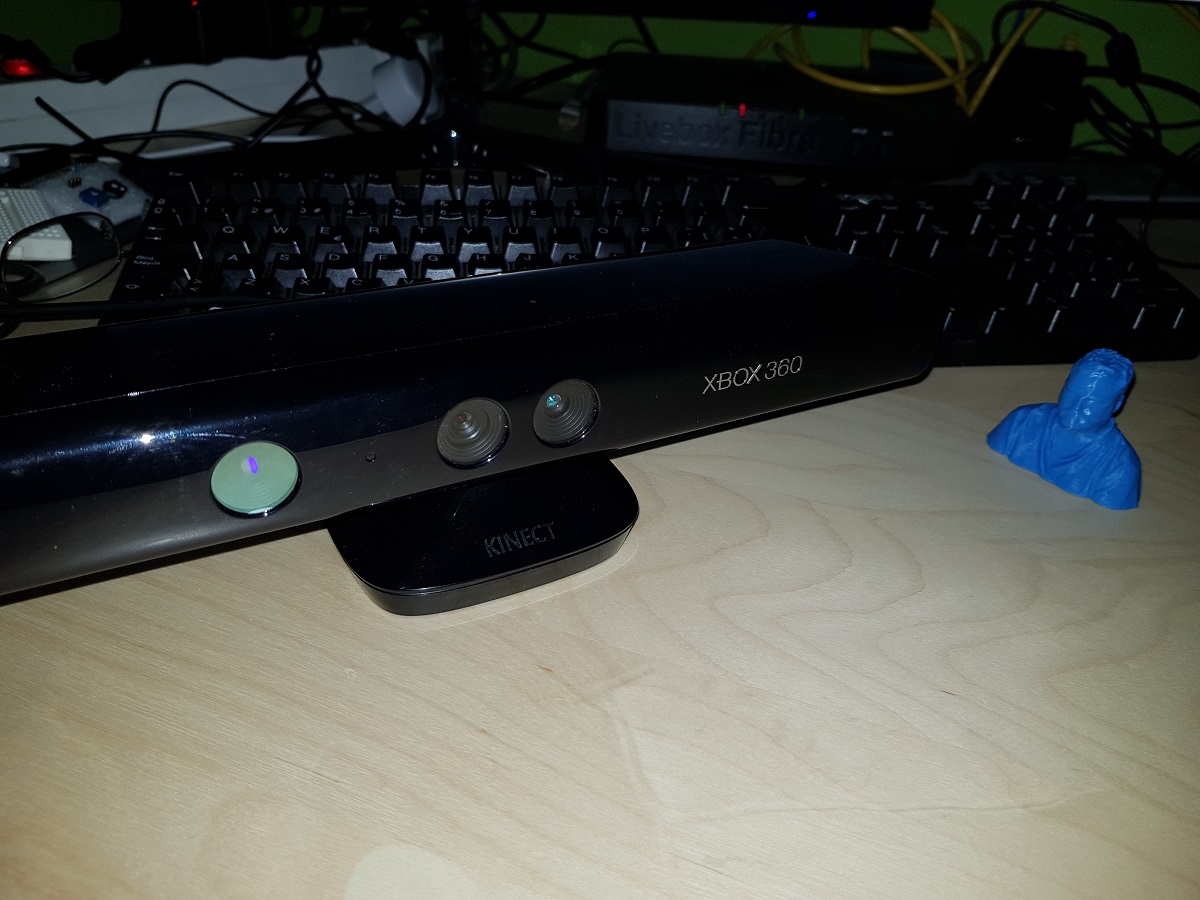
Buying a second-hand Kinect is a cheap option to get a 3D scanning capable device. Though it is not designed specifically for that purpose it can, using the right application, create a 3D model of an object, a room or a person.
I’ve tried several times to install the XBOX 360 Kinect to my Windows PC with no success, but finally, I’ve made it work.
Xbox 360 Kinect
There is a Windows version of Kinect. It costs about 155€ and I guess it is easier to install on a PC, but I had no intention to expend that money while there are second-hand units for about 20€. A friend of mine bought one for 6€!
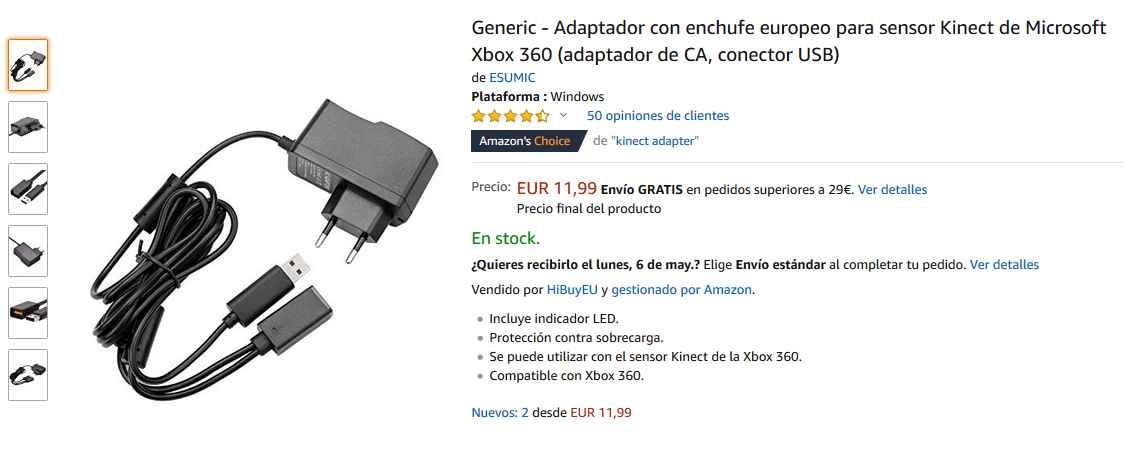
What do you need to connect the Xbox device to Windows? You need an adapter that you can order to Amazon and it costs only 12€.
Kinect adapter for PC
The converter just feeds with some extra current to our Xbox Kinect and also adapts the Xbox plug to a standard USB 3.0.
There are no more hardware requirements. All you need is to install the software to make it work, and at that point is where I got in troubles.
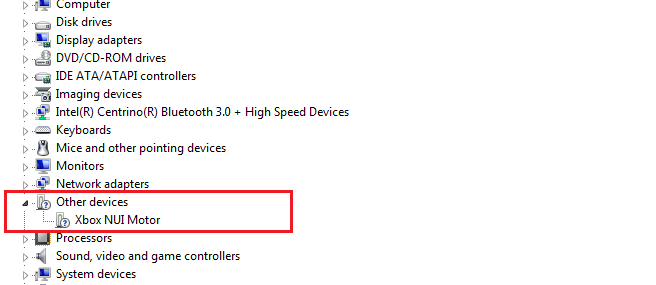
If you read the available tutorials on the web, the first step is installing Kinect for Windows SDK and after that connecting your Kinect to any USB 3.0 port. The device should be autodetected and de Kinect devices (camera, audio, and motor) will be shown on the Windows Device Manager.
Instead of that, what I got after installing was this:
Xbox NUI Motor
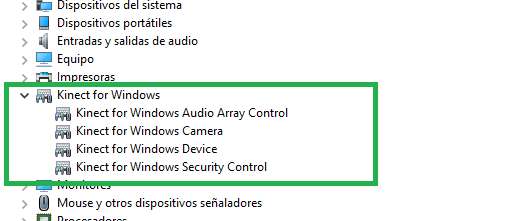
If this is also your case and you installed the latest version of Kinect for Windows SDK (version 2.0), try the following:
Unplug the Kinect from the USB 3.0 port
Remove the version 2.0 software (It is advisable though I didn’t remove it from my computer)
Install the previous version of Kinect for Windows SDK (version 1.8):
or you can download it from here if it is not available there.
Plug the Kinect again in
The correct drivers will be now installed
Kinect for Windows Devices
What todo do after that?
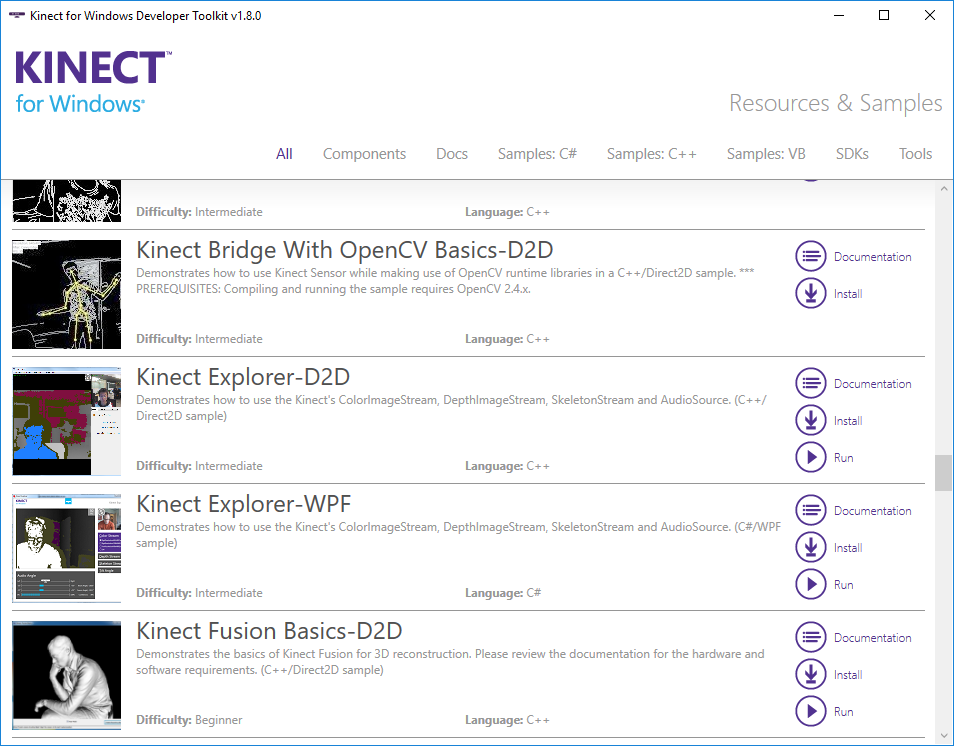
Try installing Kinect for Windows SDK Toolkit. It contains a lot of utilities and POCs to show the capabilities of Kinect technology for Windows.
Kinect for Windows Developer Toolkit
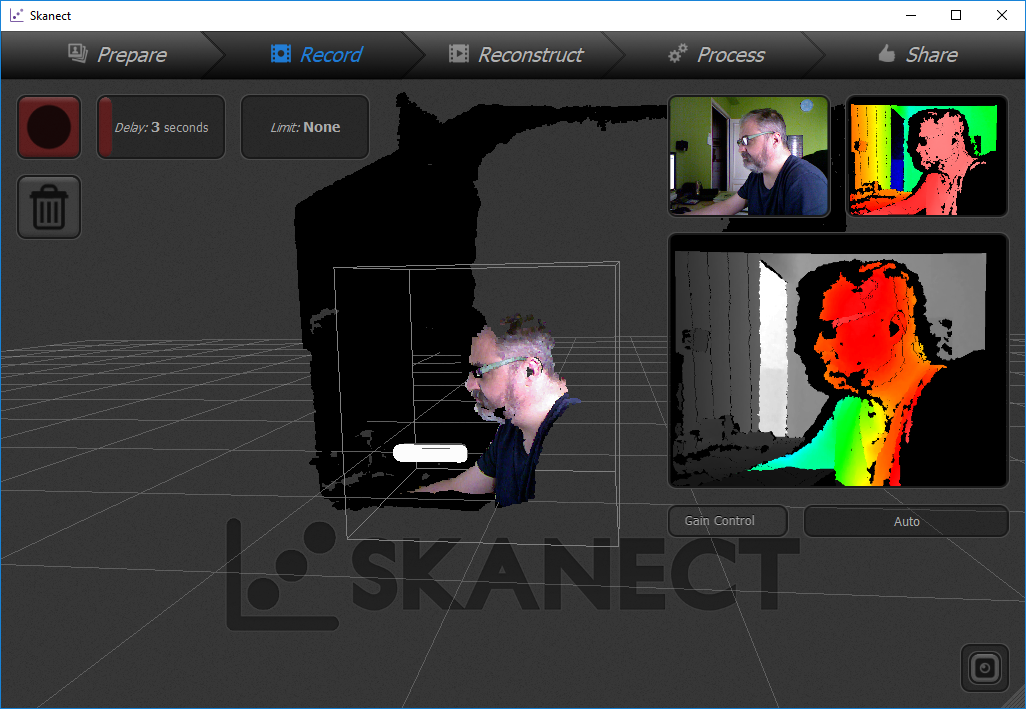
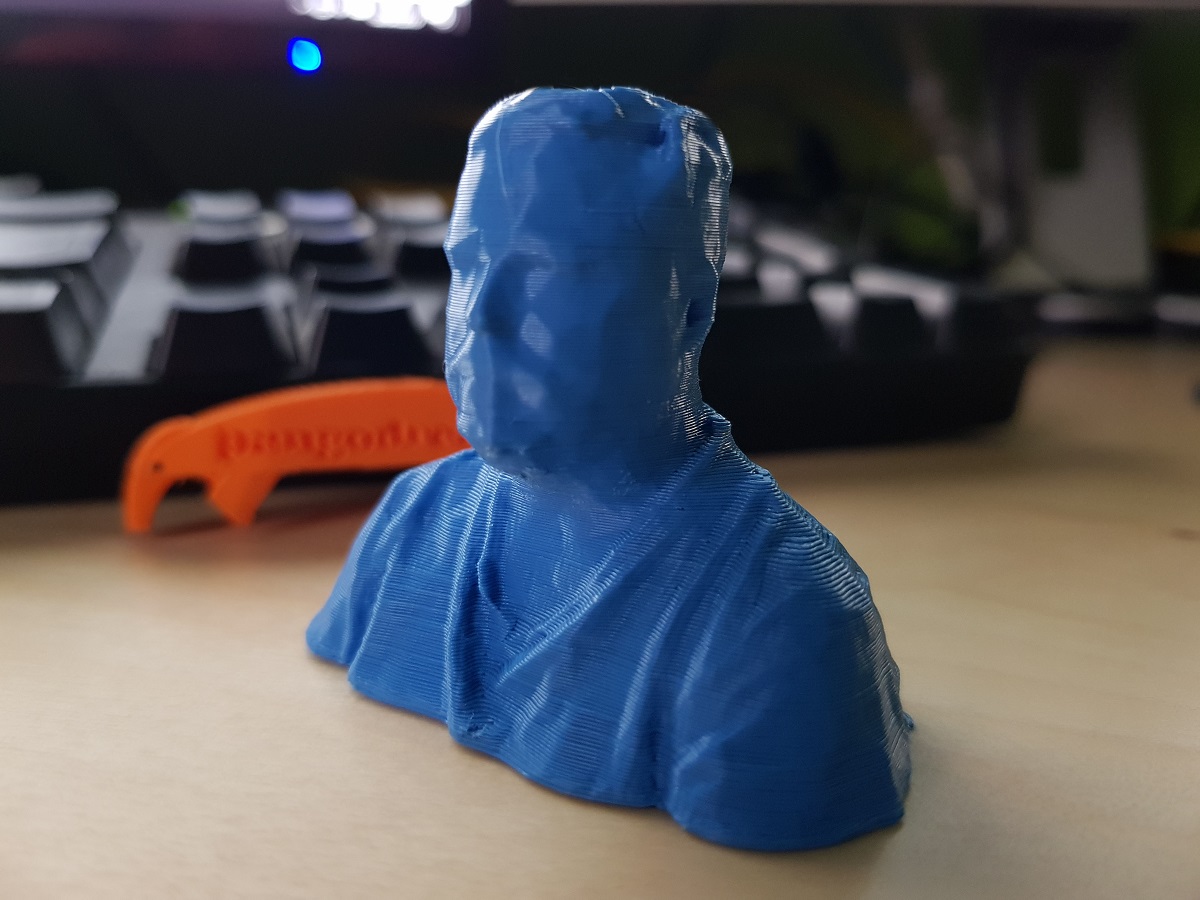
Scan an object or even yourself to make a 3D printing
Skanect is a very good choice, but the free version only allows exporting a limited number of polygons. Nonetheless, the result is at least curious and you can recognize yourself though you print it using Blue Sky PLA)
Skanect Scanner
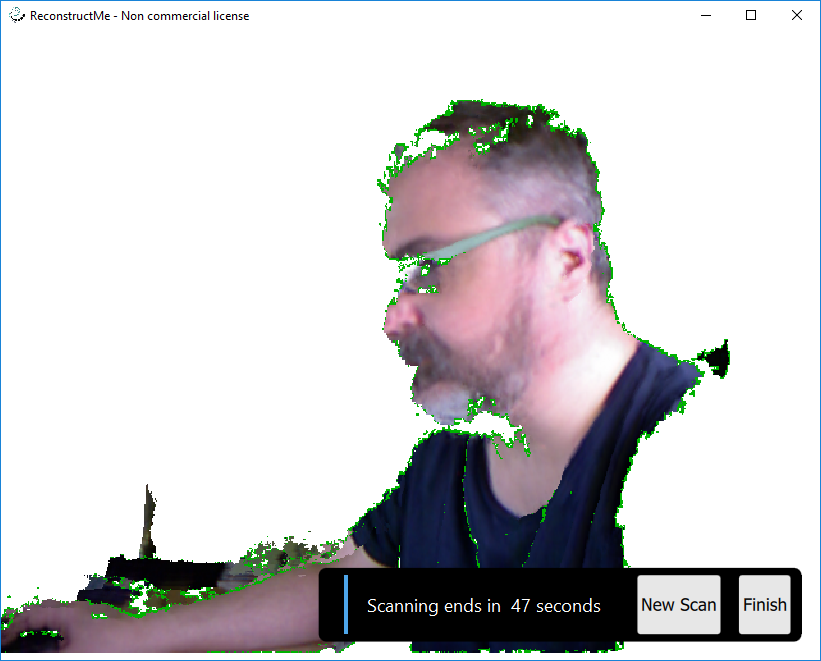
Reconstructme is also a good option, though is less straight and I think it is more focussed on making a virtual color model of the object.
Reconstructme while Scanning
Both Recostructme and Skannect will allow you to export a .obj or .stl file and then you can post-process it with the application of your election.
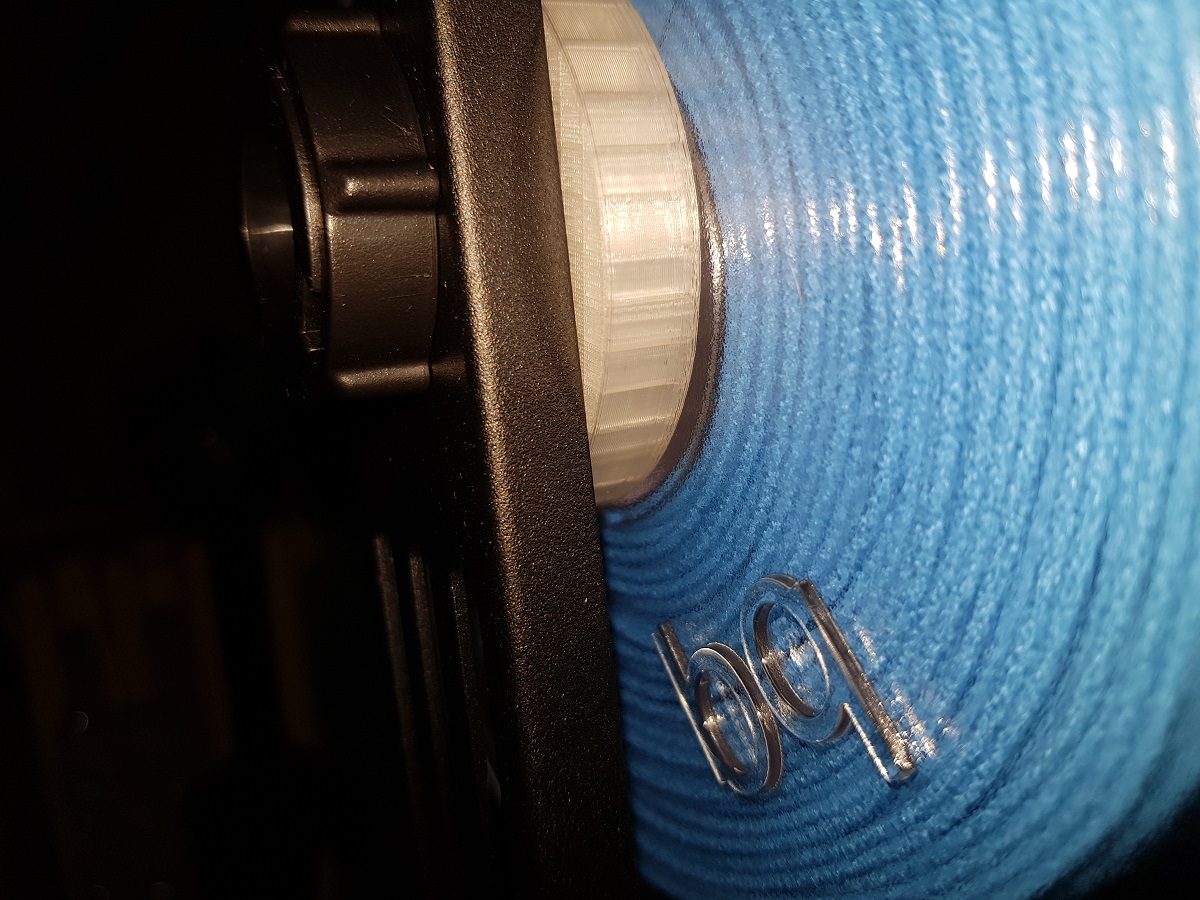
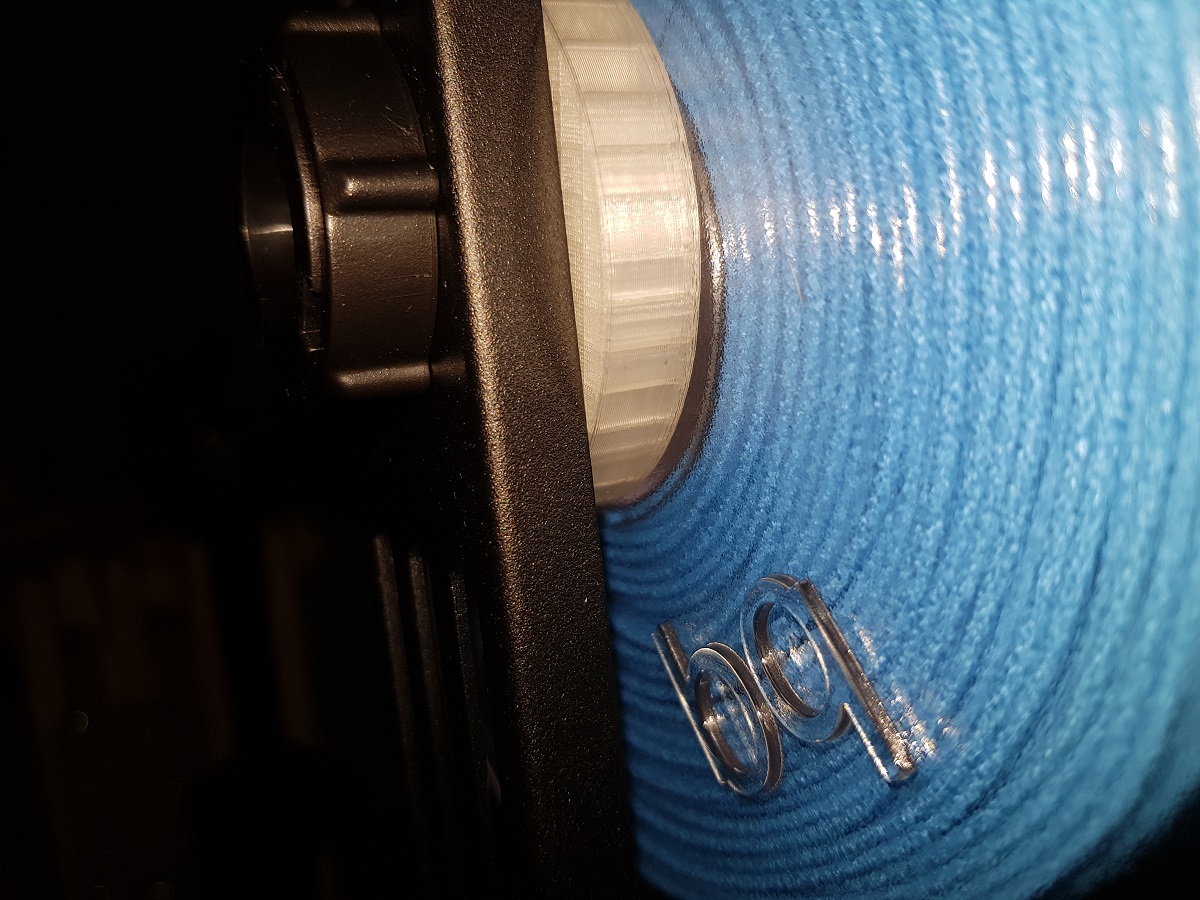
I’m quite happy with BQ Easy Go PLA filament. I have been using it during these last days and had no problem at all, but it is also true that I read some comments in Amazon before using it and there is an issue with this filament and Creality Ender 3 printers:
There is a big logo in one of the sides of the coil. It may occur that this logo gets stuck in the coil guide of the Ender 3.
BQ Logo in coil side
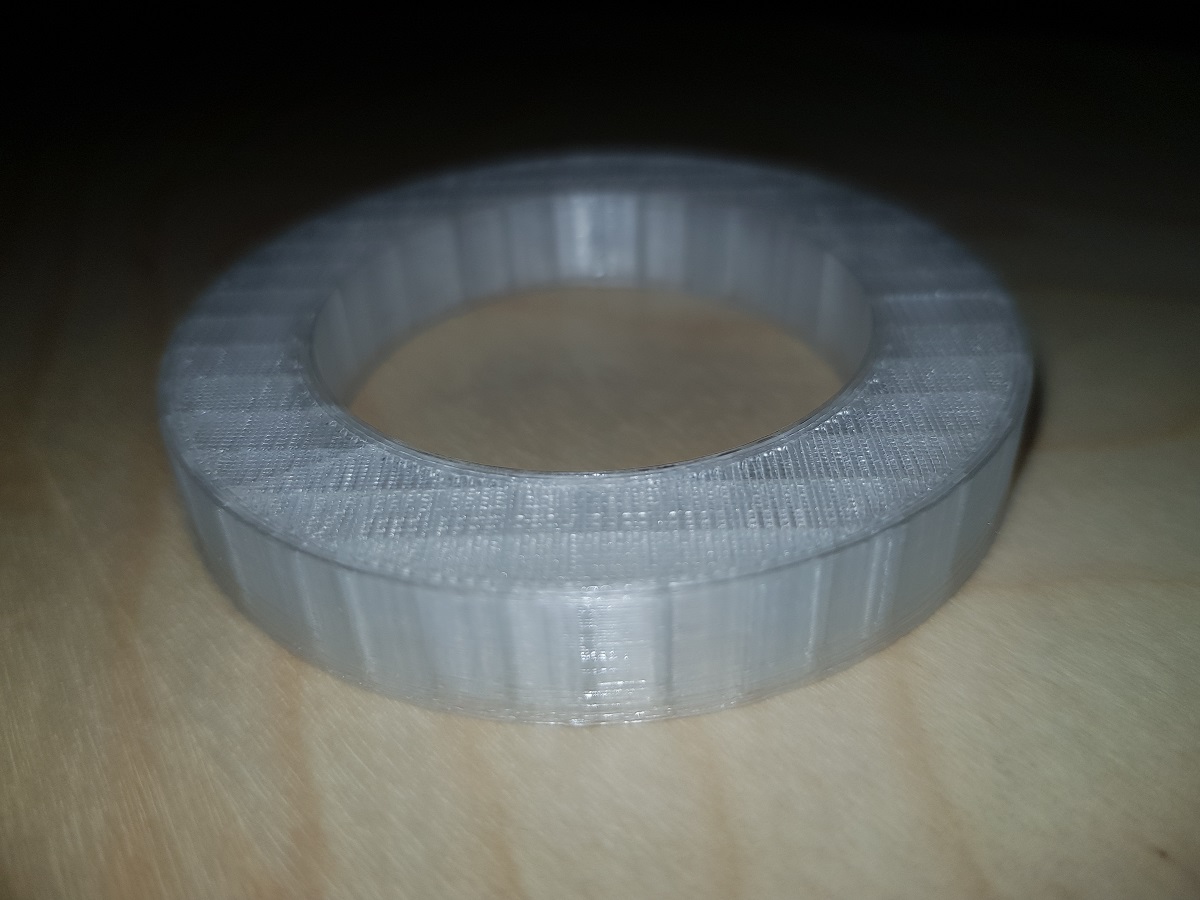
The easiest solution I found for this was printing a ring to prevent the coil from getting too close to the printer guide.
If you own a Creality Ender 3 and want to deploy Marlin on it you should first ask yourself why.
Why
When searching Google for that topic, a bunch of results and video tutorials appear in front of you talking about the ‘benefits’ of that ‘improvement’. Well, if you read the details you will find comments like Ender 3 is a great 3D printer but comes with some defects and the new version of Marlin is the solution to that. But seriously, what are those defects?
I bought the printer 3 weeks ago and I have to say that the results are impressive. Ok, it is my first 3D printer, but before acquiring it I was reading a lot about the subject and the most common advice in every web I visited was: don’t get frustrated about the results of 3D printing? You will get a lot of bad results and that’s normal. I’ve got too few bad results with my Ender 3… until yesterday.
Is it worthy?
After reading and watching some tutorials I decided to install a bootloader on my printer to upload the latest Marlin version to it. Why? I still don’t know.
Burning the Bootloader
It wasn’t easy. I look for some old Arduinos I knew I had and found a Duemilanove and a Mega. The board used by Creality in it’s Ender 3 is compatible with ATMega Sanguino boards, so all you have to do is burn the bootloader on the board and then use Arduino IDE to upload the sketch with the latest Marlin version.
Burning the bootloader has to be done with an ISP programmer or using an Arduino as ISP. The procedure is quite simple:
Open the board box of your Ender 3
Locate the ICSP connector
Use five Dupont Female to Female wires to connect:
GNDto GND
5V (VCC) to 5V(VCC)
SCKto SCK
MOSIto MOSI
MISOto MISO
Use one Dupont Female to Male wire to connect:
RESETto IO10 of your Arduino board
Upload Arduino ISP sketch to your Arduino (in examples)
Change board to Sanguinoand Programmer to Arduino as ISP
Burn Bootloader
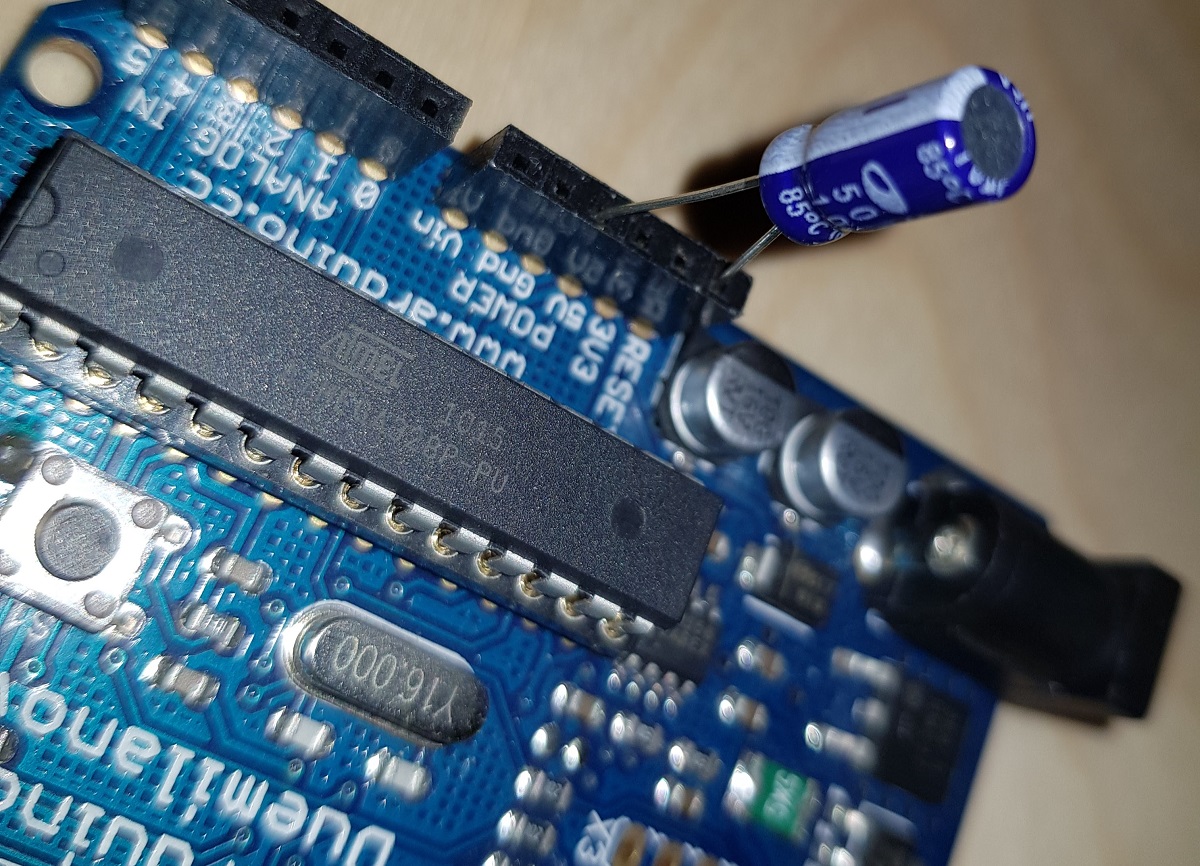
I can’t remember how many times I tried. Changing port, reviewing wires many times, switching on / off, using Duemilanove and Mega… and nothing worked. I got the same error always and it seemed there was a problem getting synchronism in Avrdude tool.
Arduino’s ISP issue and the capacitor workaround
Then I remembered I had this problem years ago when playing with Arduinos. First Arduino models had problems with reset while negotiating ISP programming and the workaround is using a 10μF electrolytic capacitor between reset and GND pins.
The capacitor between RST and GND
Remember electrolytic capacitors have polarity and you shouldn’t reverse them:
After plugin the capacitor I was able to burn the uploader.
Uploading Marlin latest and ‘improved’ version
As expected, the printer was now reset. No printing program inside it and a blank LCD screen showing nothing.
That is the moment to upload Marlin latest software using Arduino IDE.
My intention is not telling you all the steps to do this, as the Internet is full of videos and tutorials (and remember, I don’t recommend doing it), but telling you what happened to my printer after doing that.
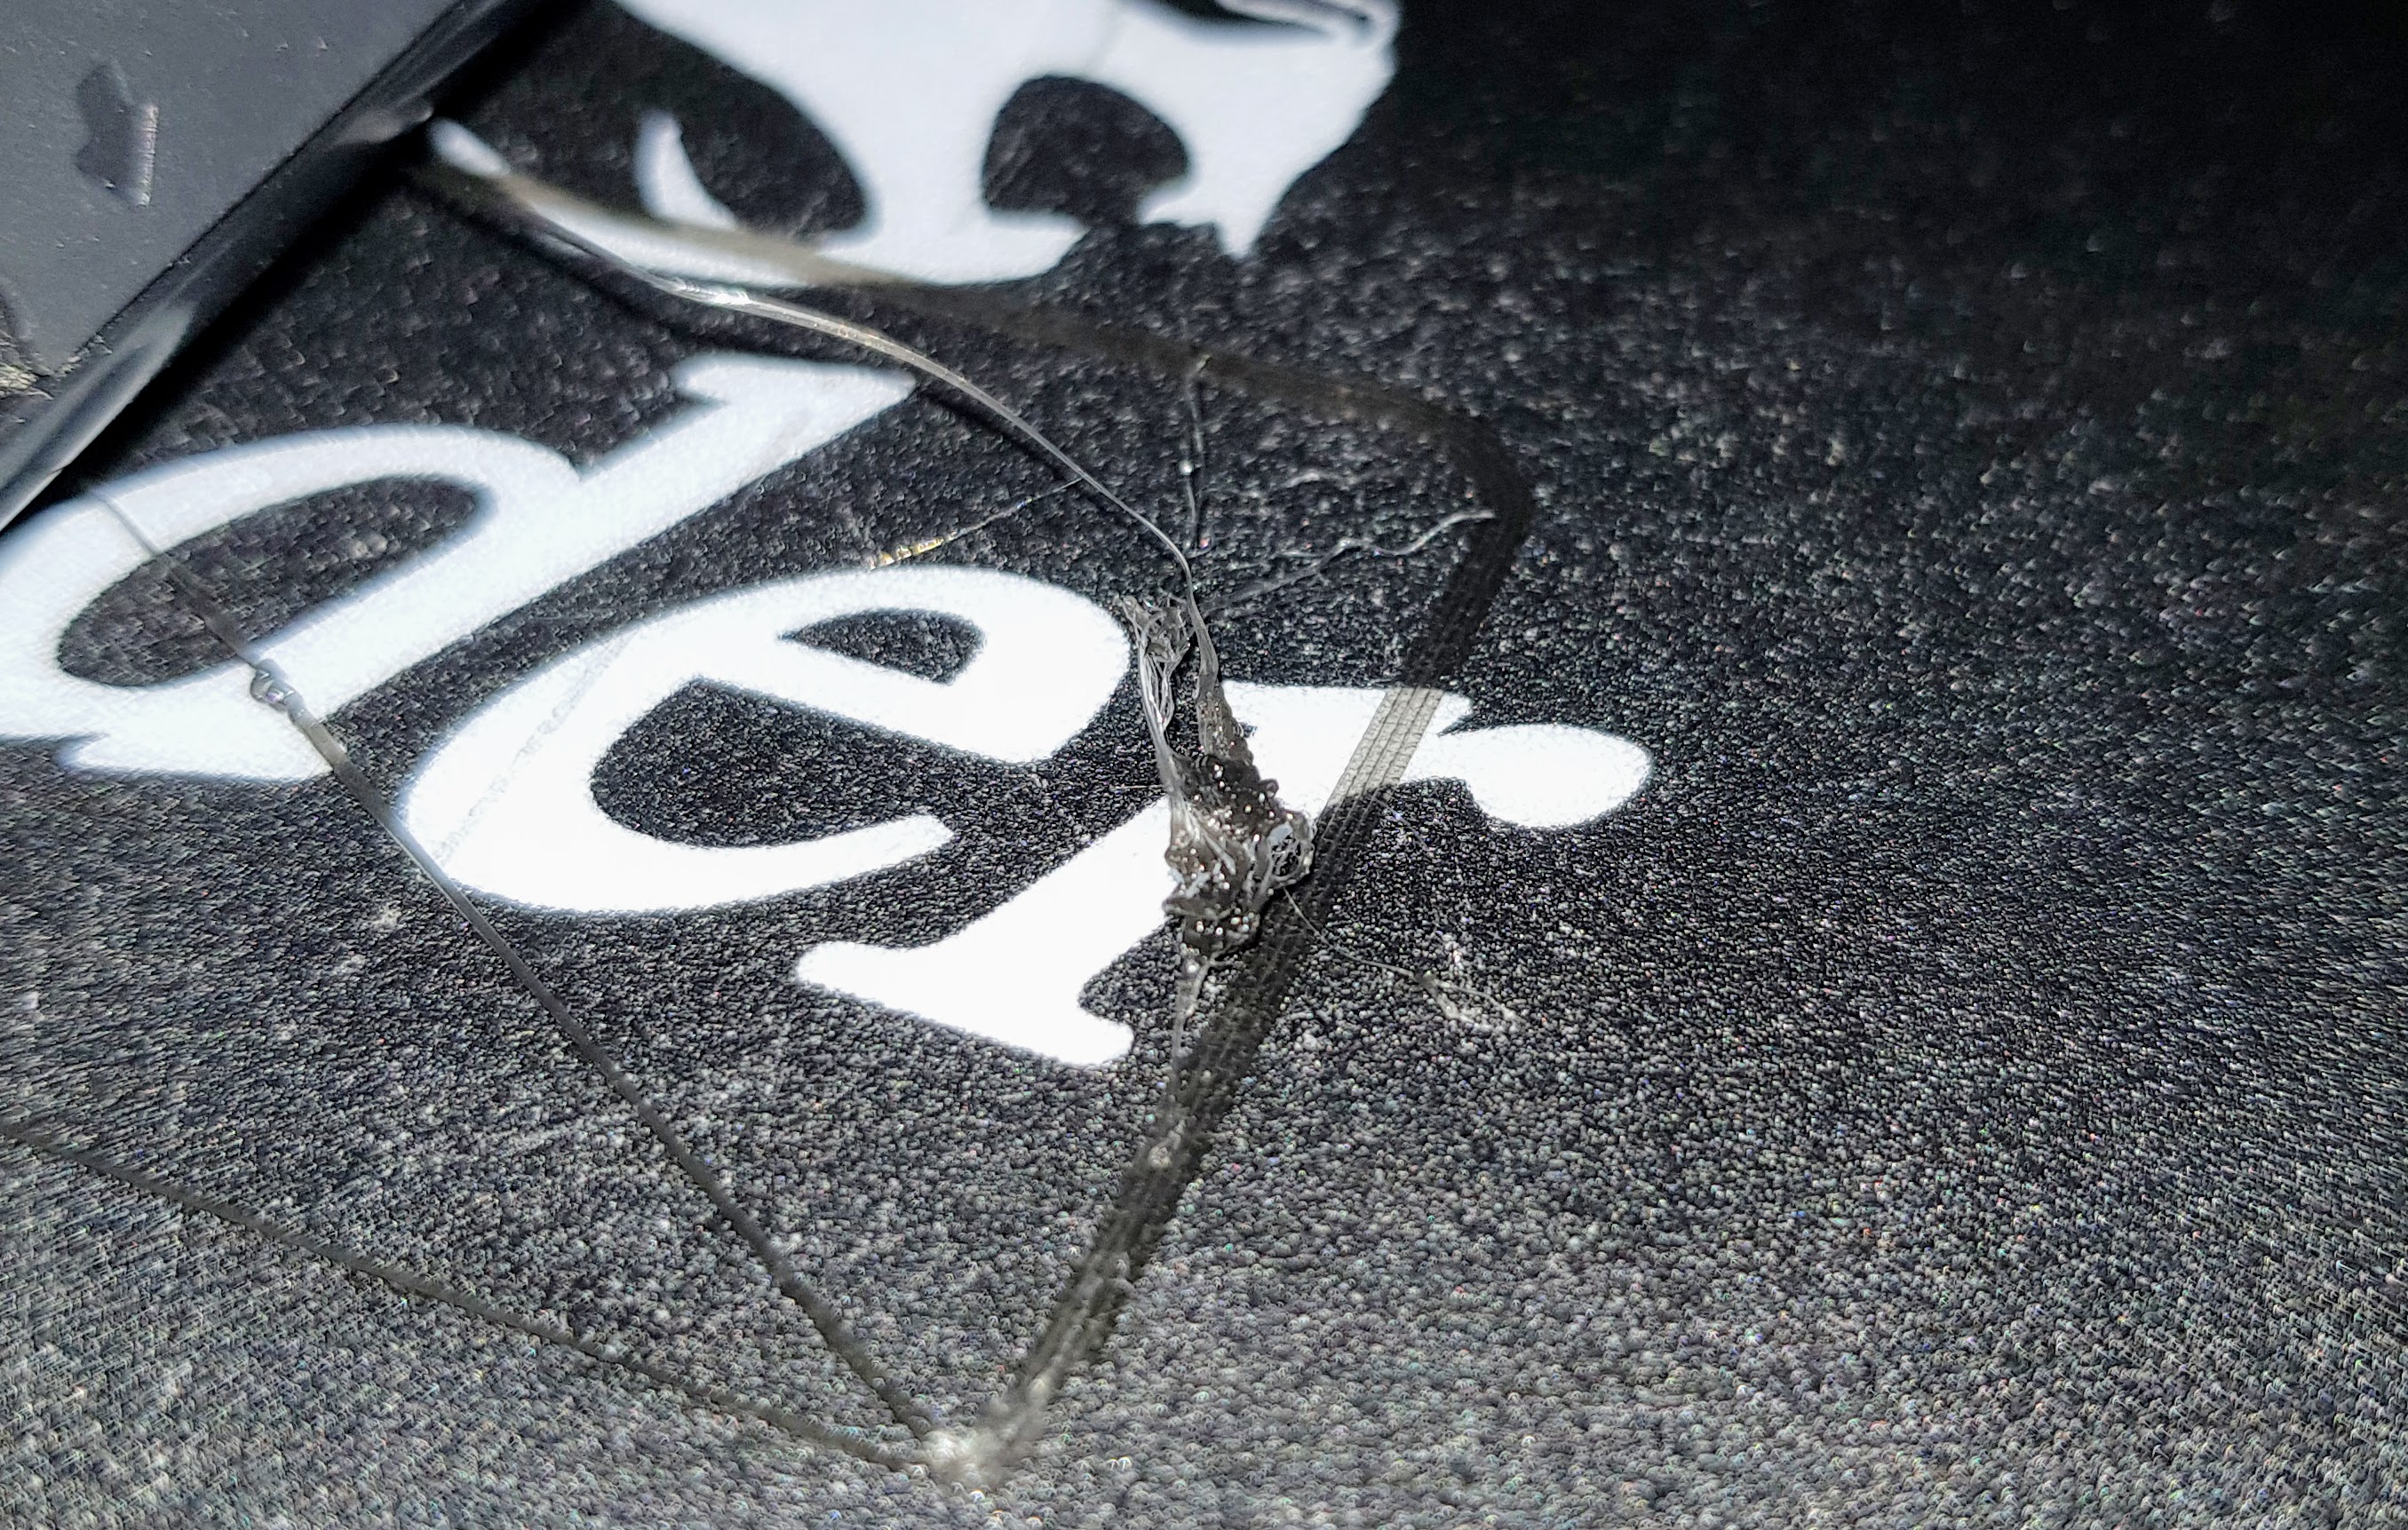
I uploaded the latest Marlin software with some miracle customizations performed in the parameters code by an expert guy. The result? After leveling the bed I tried with a small box and…
Filament not sticking to build plate
That was the first time in three weeks. Before that, the adhesion was very good. I tried some more times, I calibrated and leveled the bed and always the same result. I found that when the nozzle never got enough close to the plate. Maybe the miraculous customizations?.
I decided then to go back to the Creality version, which is a previous Marlin version adapted for Ender 3.
Creality Ender 3: Going back to manufacturer version
The good news is that we can now upload code to our printer because we have deployed a bootloader on it.
All we have to do is to find the manufacturer’s original code.
Locate the Marlin folder inside the folders created by the Unrar tool.
Copy the Marlin folder to a better location and edit the Configuration.h file.
Change the language for display. Locate the line (line #1188 in my version)
#define LCD_LANGUAGE cn
and replace cn with your language code (en, de, es, it, fr, …)
Compile and upload to the printer port detected when plugged in.
Remember you have to set these options in Tools menu:
Board: Sanguino
Processor: ATmega1284 or ATmega1284P (16MHz)
Port: The one detected by your machine.
Programmer: AVRISP mkll
Conclusion
I think it isn’t worthy of it deploying the latest Marlin version on your Ender 3, mainly because you are not going to get a lot of improvements.
In the other hand, it is very interesting having a bootloader installed and the capability of loading the code into the printer, but only if you need to customize the code.
A lithophane (French: lithophanie) is an etched or molded artwork in very thin translucentporcelain that can only be seen clearly when back lit with a light source.
If we put a light in the back of a translucent sheet, depending on the thickness of the sheet it will appear lighter (when thin) or darker (when thick).
Getting a picture and making some calculations it could be possible to create a 3D printed object of different thickness at the points where we want to make the light darker or lighter to reproduce the original picture.
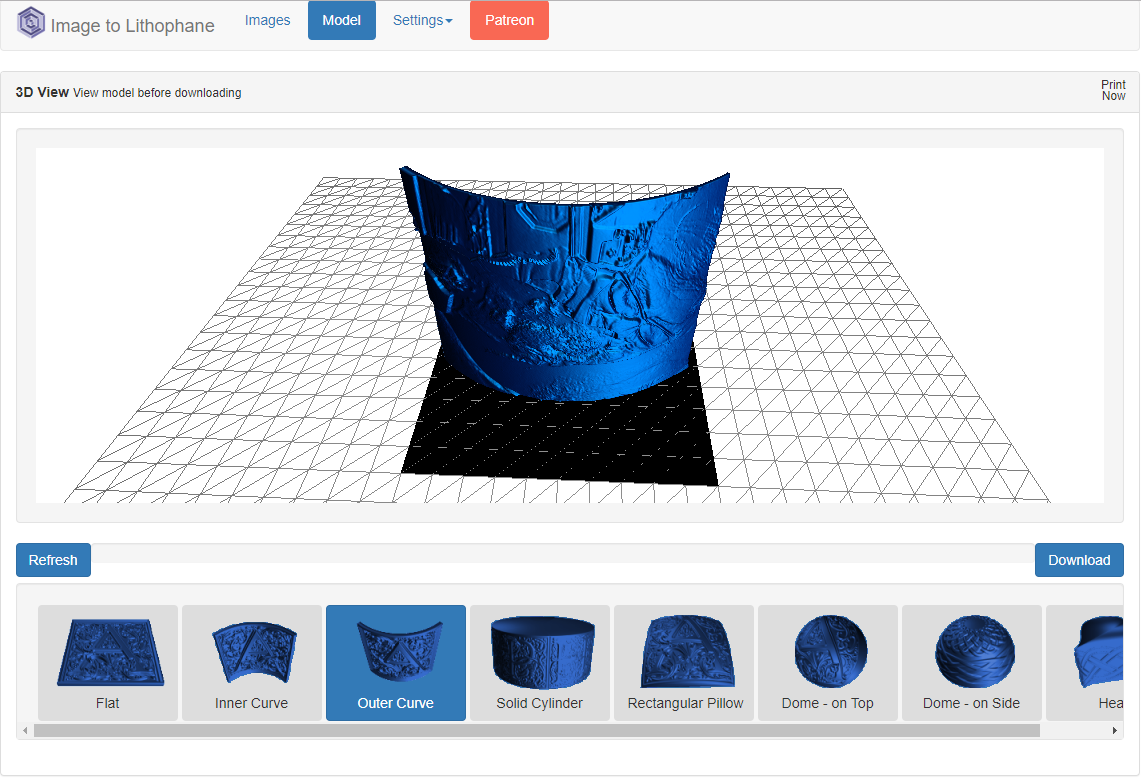
That’s what Image to lithophane does. By uploading a picture it makes all the work for us and let us download a .stl file to print the figure.
As this has been the first time I’ve tested it, I’ve first converted the picture to Black & White so I can manually adjust brightness and contrast and then uploaded the .jpg to the web.
My family in B/W
The web is plenty of options and parameters, but it is very intuitive and it is easy to choose the model we want to create from our picture. Take care of the option Settings / Image settings / Positive – Negative. If your picture is not inverted use Positive option.
Model created by the application
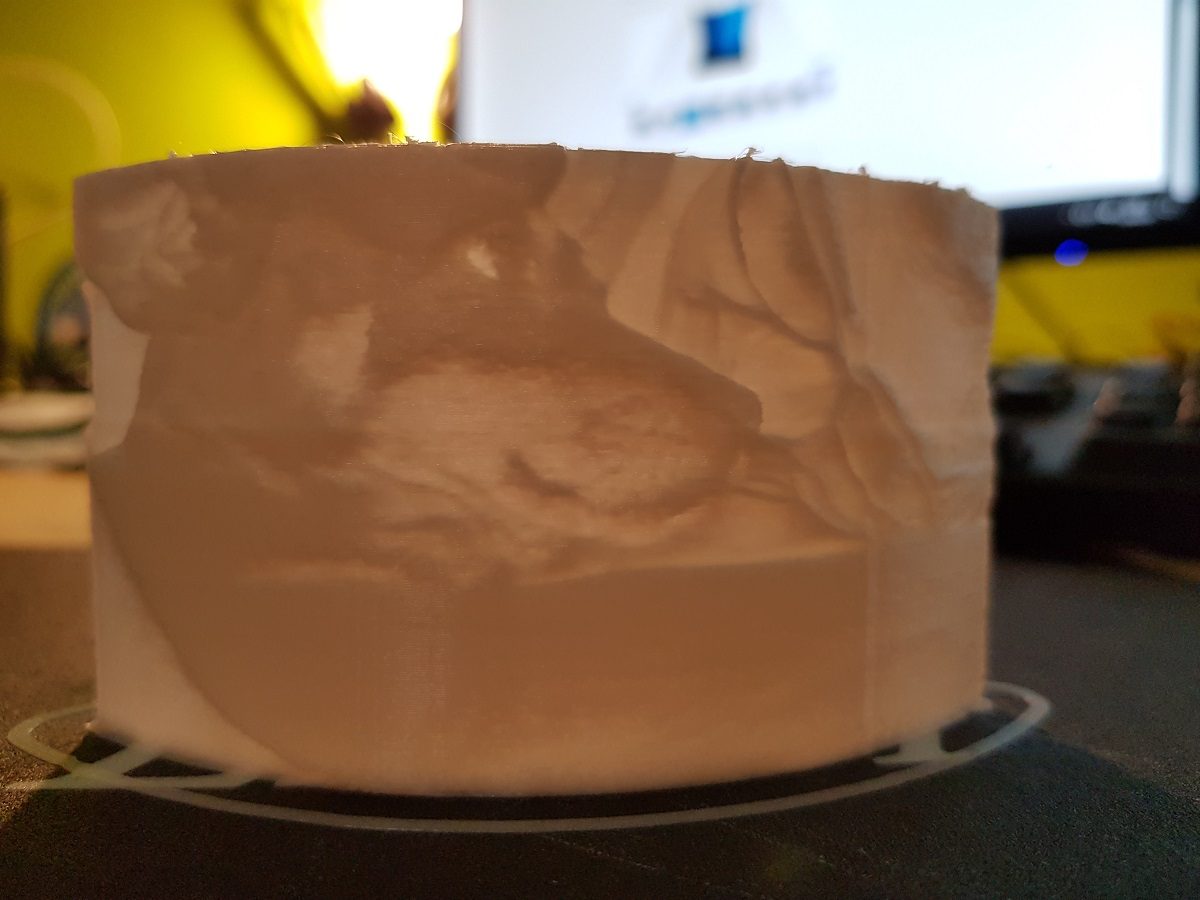
After downloading the .stl file, I prepared it with Cura taking care of filling (100% fill) and of course using white filament.
Though the figure is not very large (about 10cm width) it takes a long time to be finished (right now 17% and spent 30 minutes).
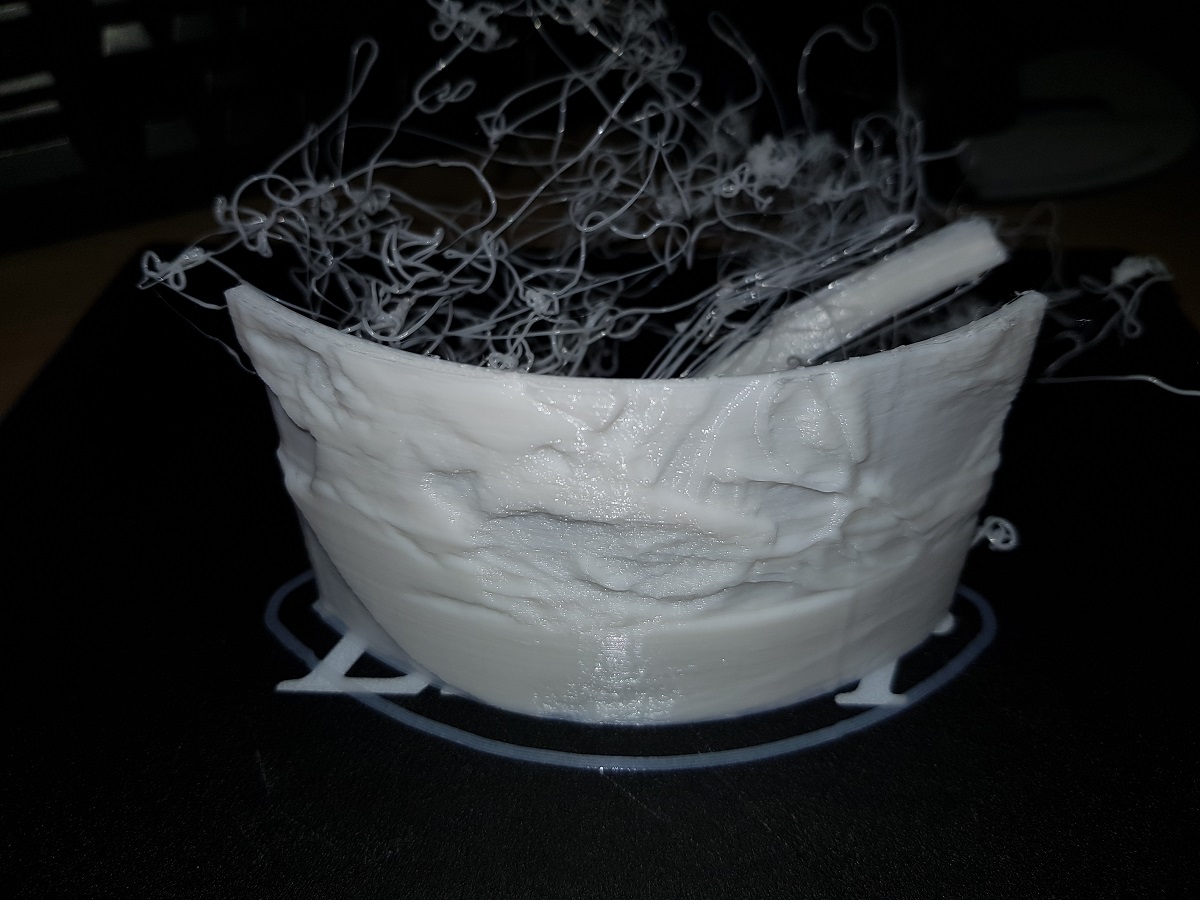
Printing… Waiting… Printing… and two and a half hours later… disaster!
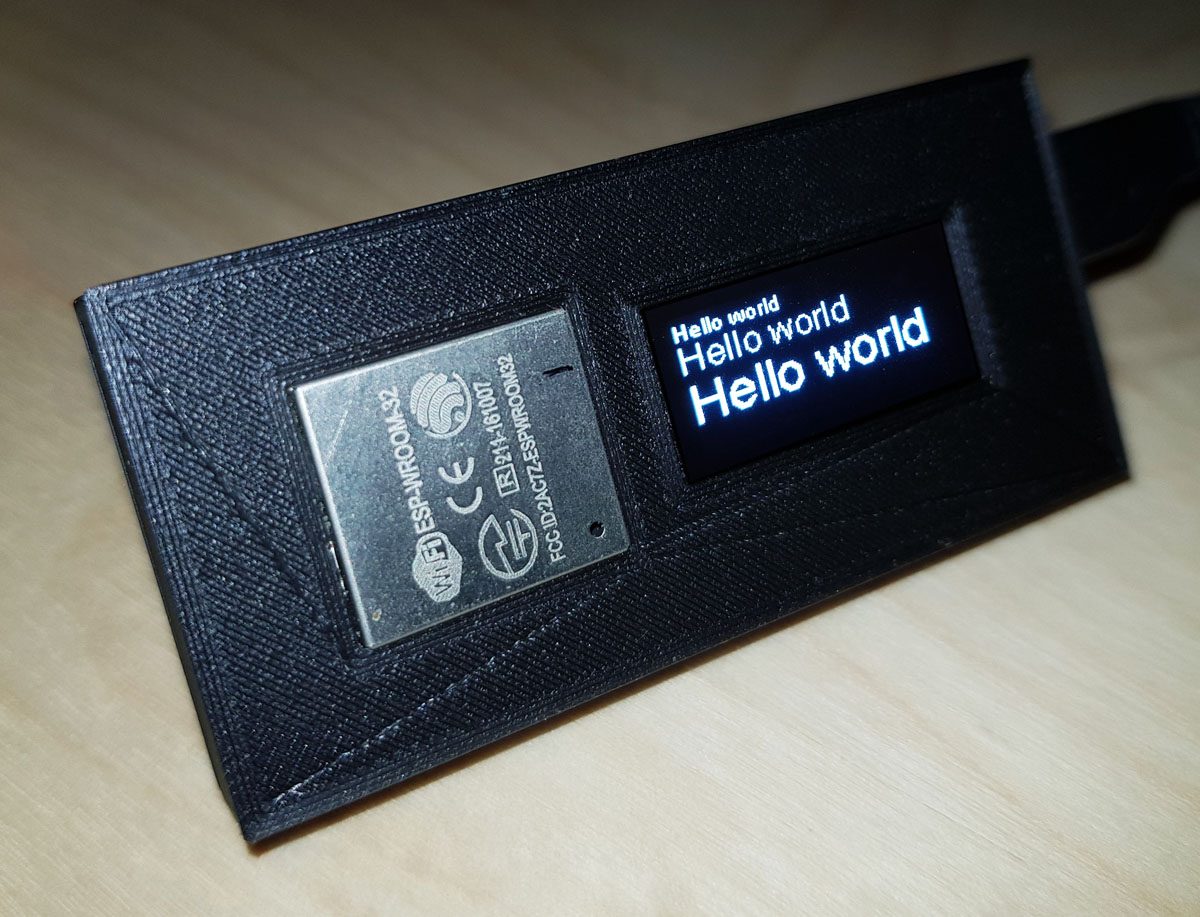
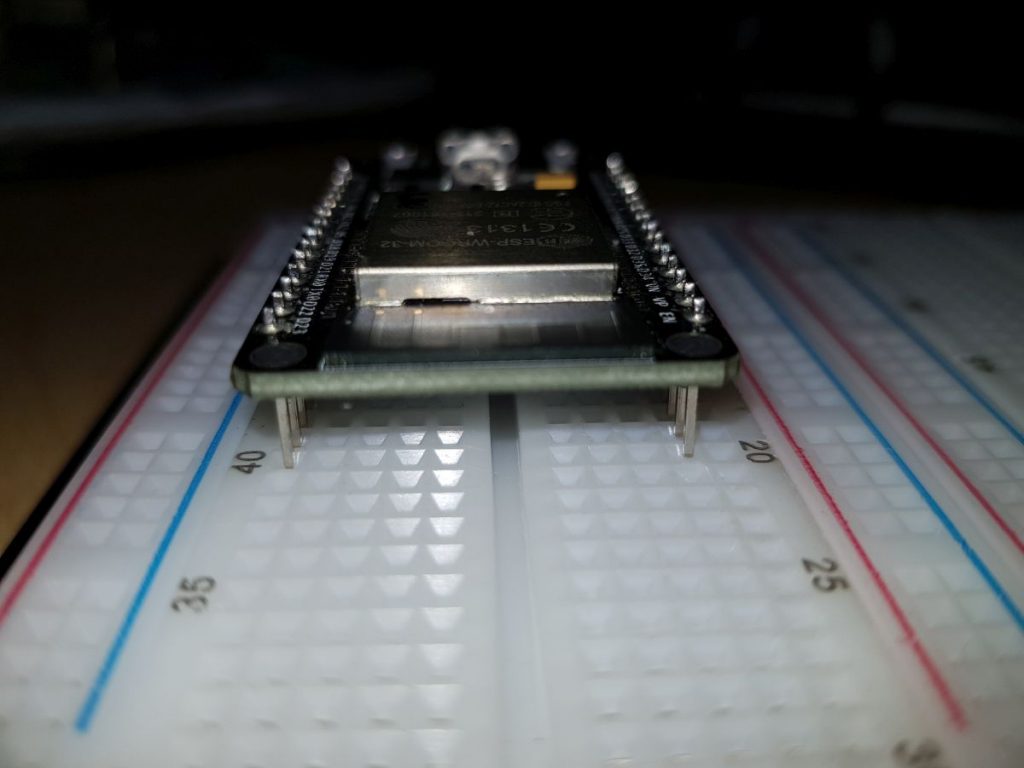
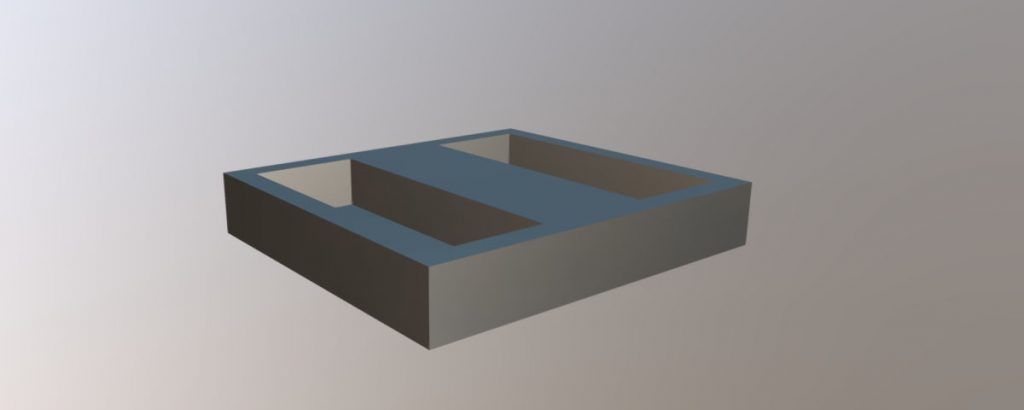
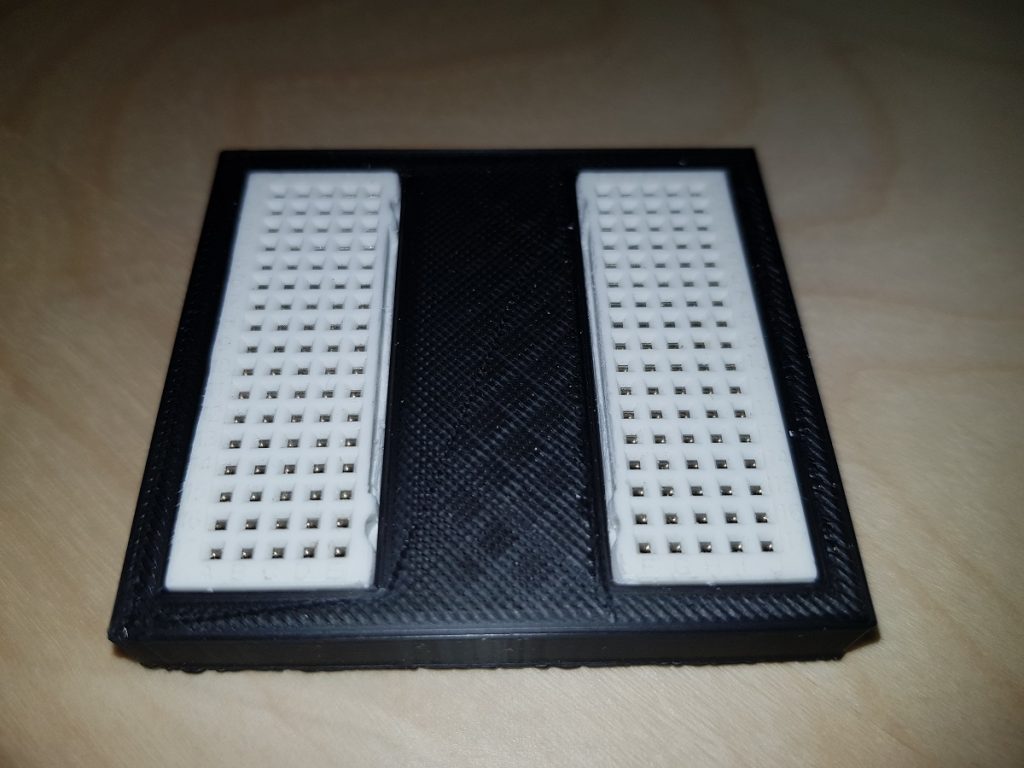
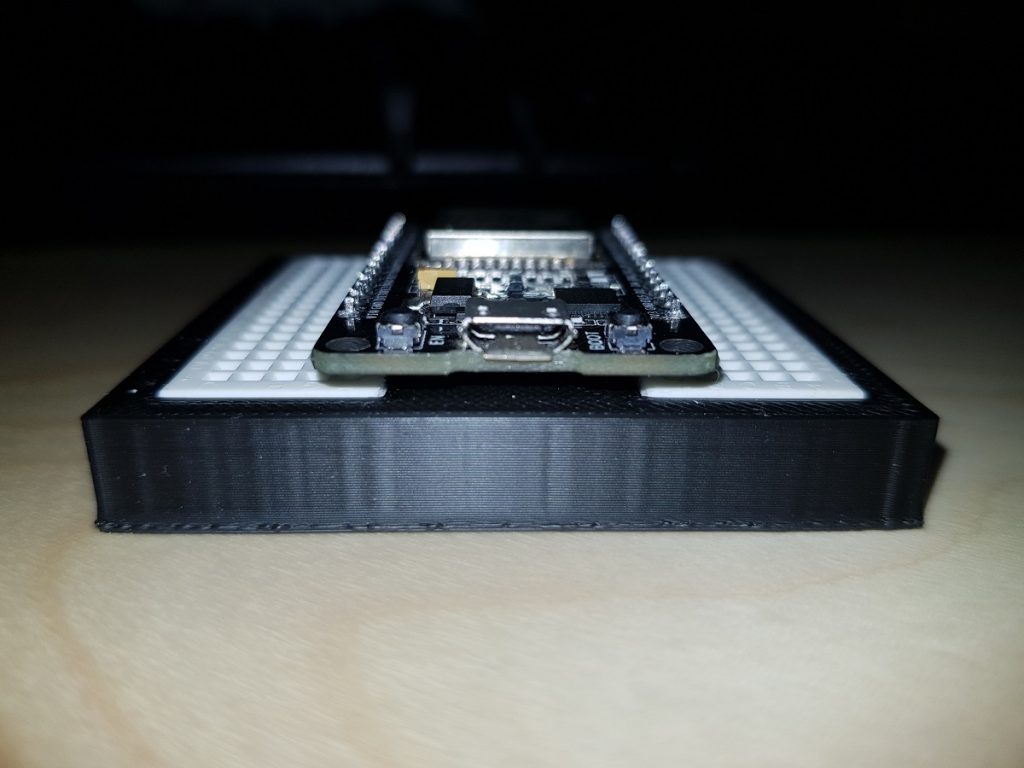
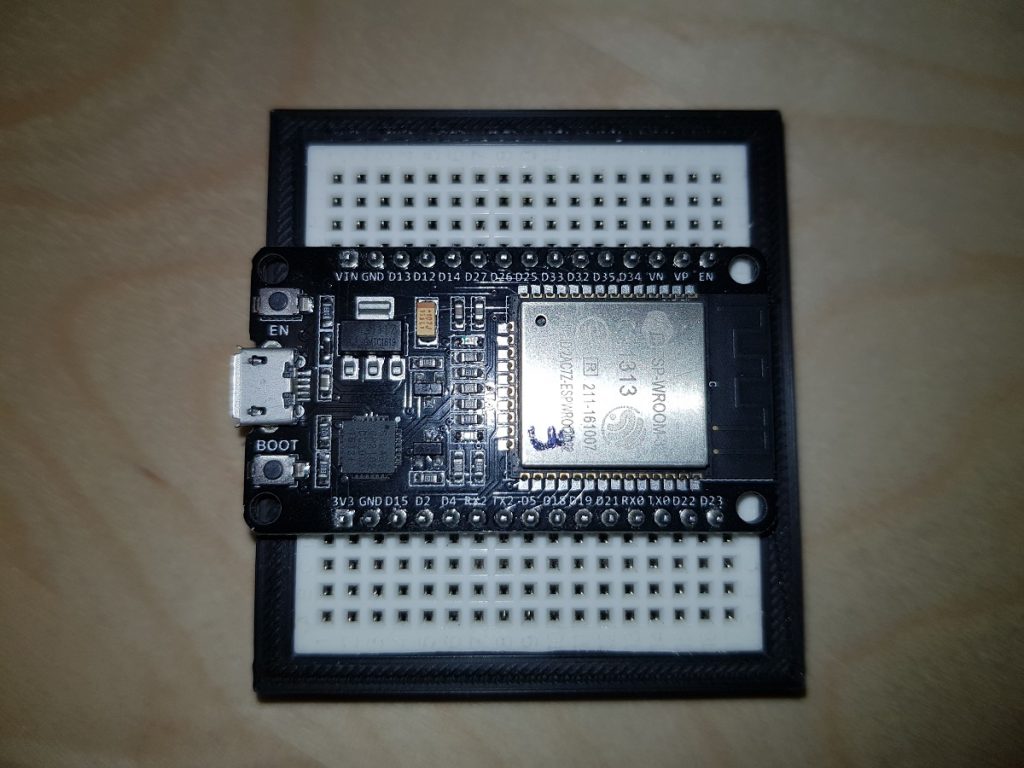
It is frustrating the first time you insert an ESP32 dev board into a breadboard and you notice there’s no room for wires.
ESP Dev Board on Breadboard
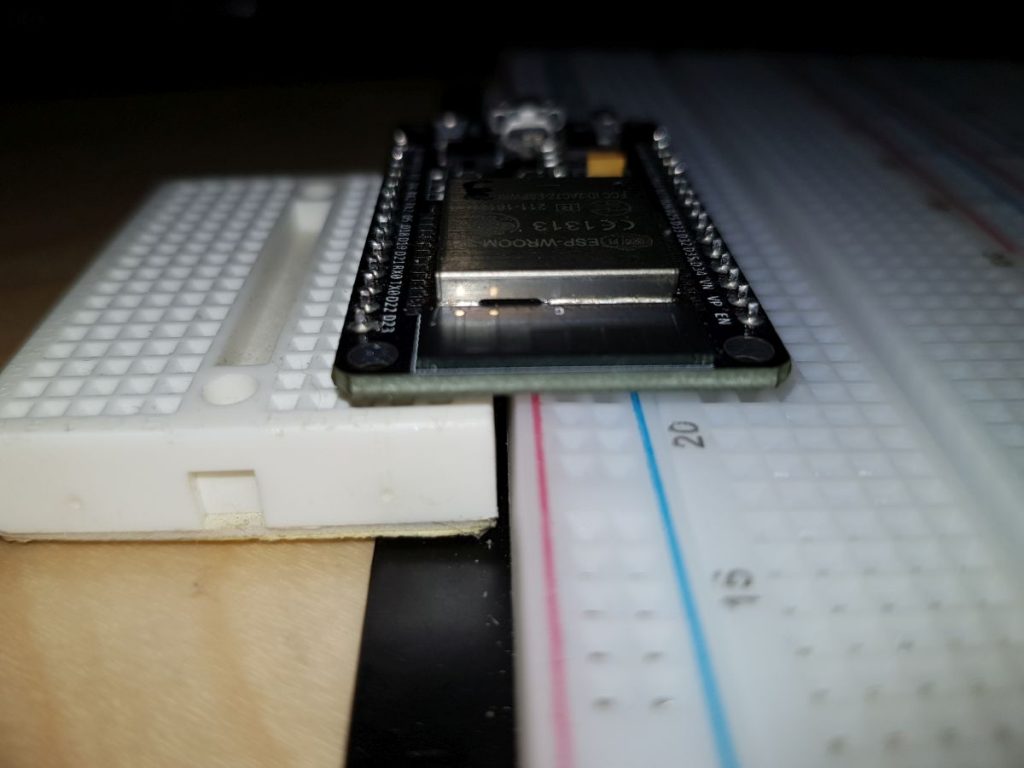
What I usually do is putting a breadboard aside another one, but I don’t like it very much.
Workaround for ESP Dev Board on two breadboards
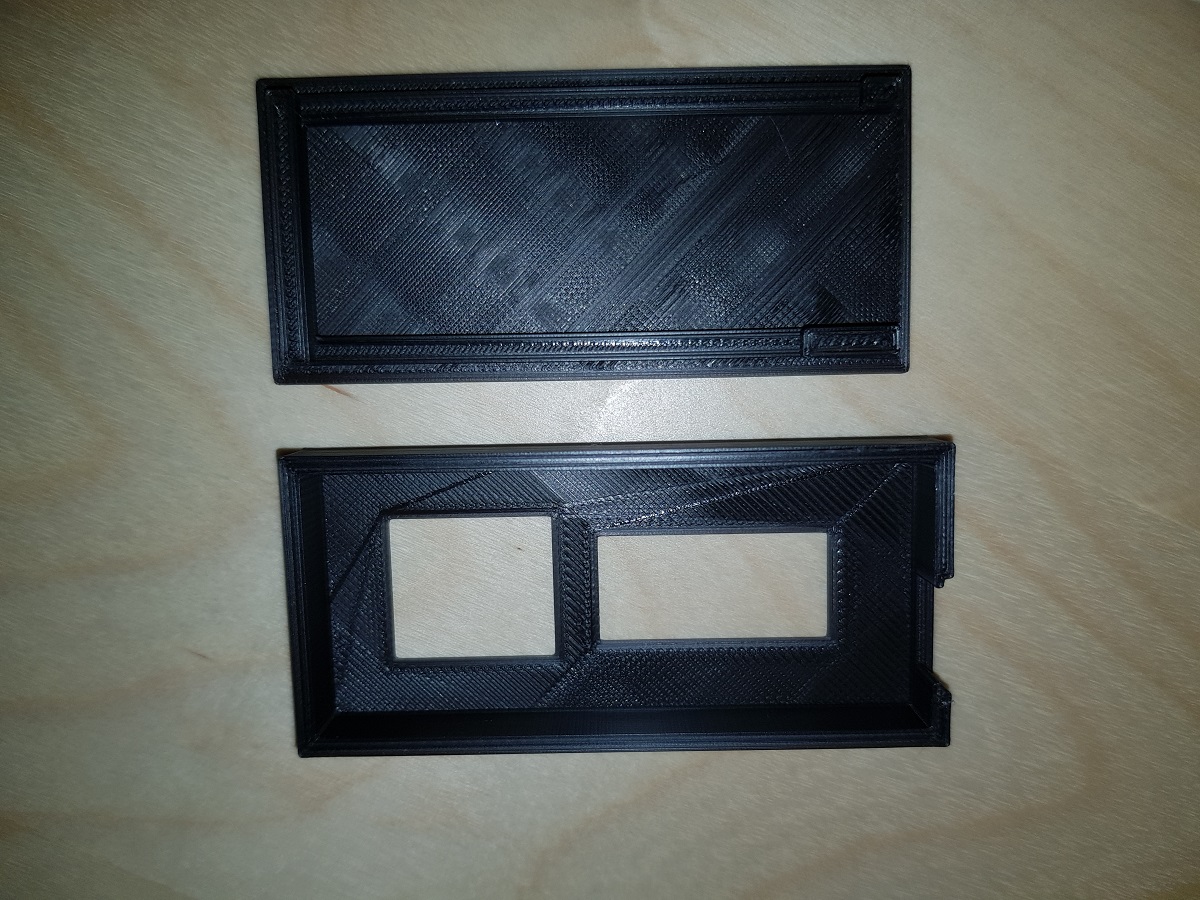
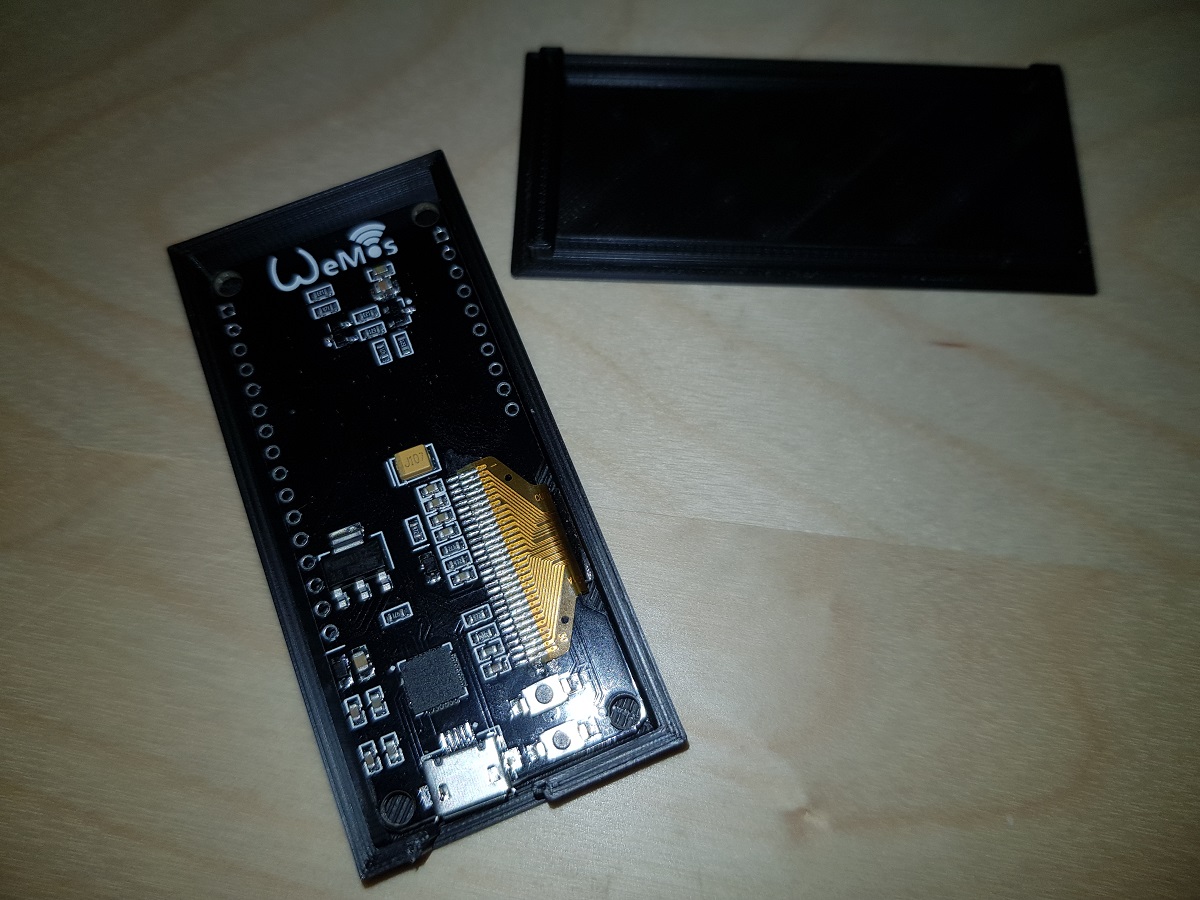
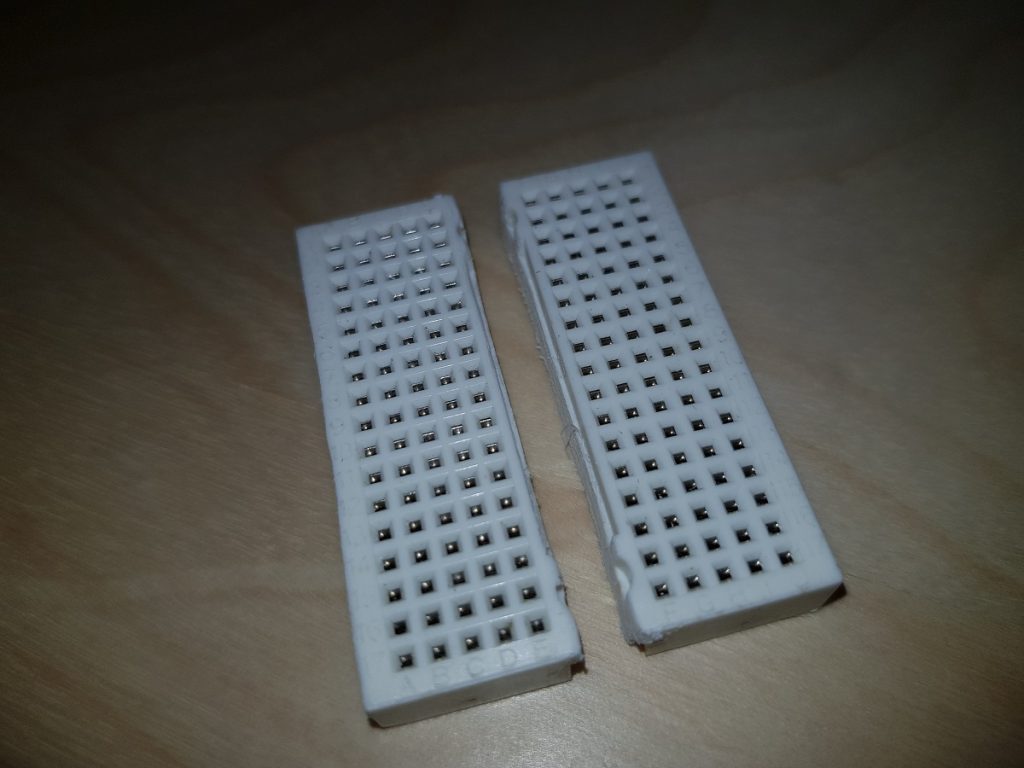
I decided then to split the small board into two pieces and insert them in a 3D printed base so that the dev board pins get into the first row of holes and the rest remain available.
Split breadboardESP32 Dev Board on the split breadboardBreadboard splitter
Breadboard SplitterBreadboard Splitter side viewBreadboard Splitter top view
This website uses cookies to improve your experience. We'll assume you're ok with this, but you can opt-out if you wish.AcceptReject
Privacy & Cookies Policy
Privacy Overview
This website uses cookies to improve your experience while you navigate through the website. Out of these, the cookies that are categorized as necessary are stored on your browser as they are essential for the working of basic functionalities of the website. We also use third-party cookies that help us analyze and understand how you use this website. These cookies will be stored in your browser only with your consent. You also have the option to opt-out of these cookies. But opting out of some of these cookies may affect your browsing experience.
Necessary cookies are absolutely essential for the website to function properly. This category only includes cookies that ensures basic functionalities and security features of the website. These cookies do not store any personal information.
Any cookies that may not be particularly necessary for the website to function and is used specifically to collect user personal data via analytics, ads, other embedded contents are termed as non-necessary cookies. It is mandatory to procure user consent prior to running these cookies on your website.