If you use Qlik Sense, eventually you will need to automate the execution of the data loading tasks.
Qlik Sense implements a REST API to make this and much more things. It is called Qlik Sense Repository Service API or QRS API.
There are several ways to authenticate our calls to the server. Here we will use a server certificate instead of Windows or HTTP Header Authentication.
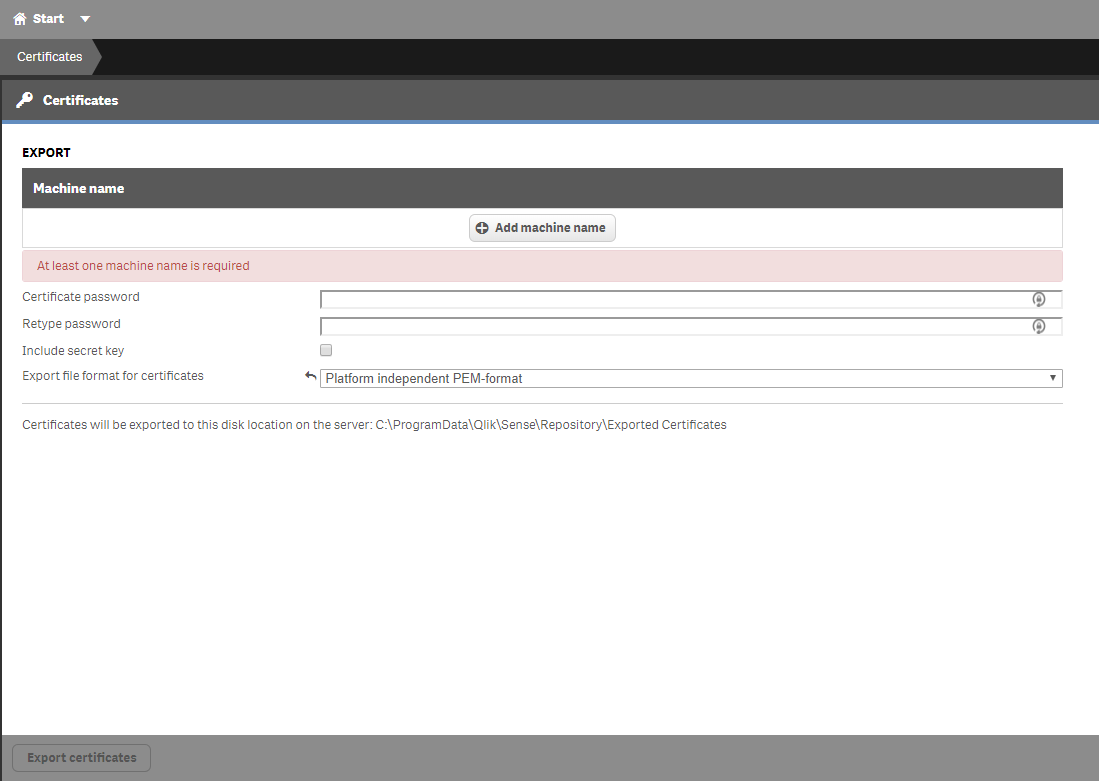
To export the server certificates, we need to access the QMC console with admin privileges. Once you are logged into the QMC, click in the last option on the left menu “Certificates”.
 You will need to enter a machine name and also a password if you want to protect your certificate. Remember, if you don’t specify a password, anyone who has access to the certificate file will have the capabilities of an admin via the Qlik Sense API.
Change the file format of the certificate to .pem and note the location where the .zip file that contains the certificates will be saved.
If you go now to the folder mentioned above and everything went ok, you will find a zip file. Unzip the file and copy both files inside (client.pem & client_key.pem) into a safe folder or an usb pen that we will reference later.
Now, let’s go to our Linux station to create the utility script that we can use to start Qlik Sense tasks.
Of course, the Qlik Sense server has to be accessible from this station.
1.- Create a folder to store both the script and the certificate files
mkdir /opt/qliktasks
2.- Access the new folder and create a new one to store the certificate files
cd /opt/qliktasks

mkdir cert
3.- Copy the cert files from your usb device or the folder where you stored them before. Once you’ve finished, there should be two files inside the cert folder you created in step 2.
/opt/qliqtasks/cert/client.pem

/opt/qliqtasks/cert/client_key.pem
4.- Now, let’s create the sh script:
4.1.- Inside /op/qliktasks folder open nano or vim to create the file taskStart.sh
nano taskStart.sh
4.2.- Make up a 16 characters long key that you will specify later in the query string and a header of the curl request. For instance:
MySixteenLongKey

1234567890123456
4.3- Copy the following content inside the file updating the files path and the 16 long key. This is a very important step because the files need to be specified with an absolute path.
#!/bin/bash

curl --key /opt/qliqtasks/cert/client_key.pem \
     --cert /opt/qliqtasks/cert/client.pem \
     --insecure \
     -X POST \
     https://myserver.intra.net:4242/qrs/task/$1/start?xrfkey=MySixteenLongKey \
     --header "Content-type:application/json" \
     --header "x-qlik-xrfkey: MySixteenLongKey" \
     --header "X-Qlik-User: UserDirectory=internal;UserId=sa_repository" \
     -d ""
4.4.- Save the file (CTRL + O), confirm and exit (CTRL + X) the editor
4.5.- Activate execution flag
chmod +x startTask.sh
5.- Now we are ready to execute a Qlik Sense task by specifying its UUID.
./startTask.sh e12ed06d-9124-4772-a07d-60cc06f05521
How to find the task UUID?
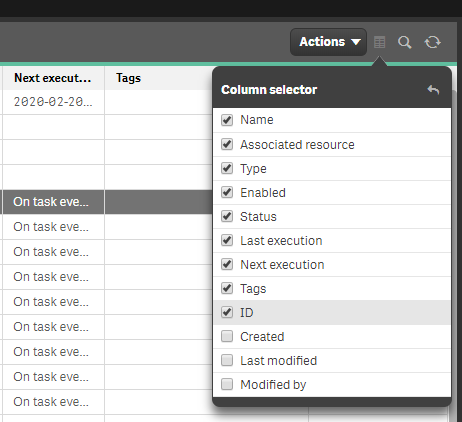
Go to QMC tasks panel and find the column menu in the top right corner. Simply activate the ID checkbox and copy from the new column the UUID of the task you need to invoke.

