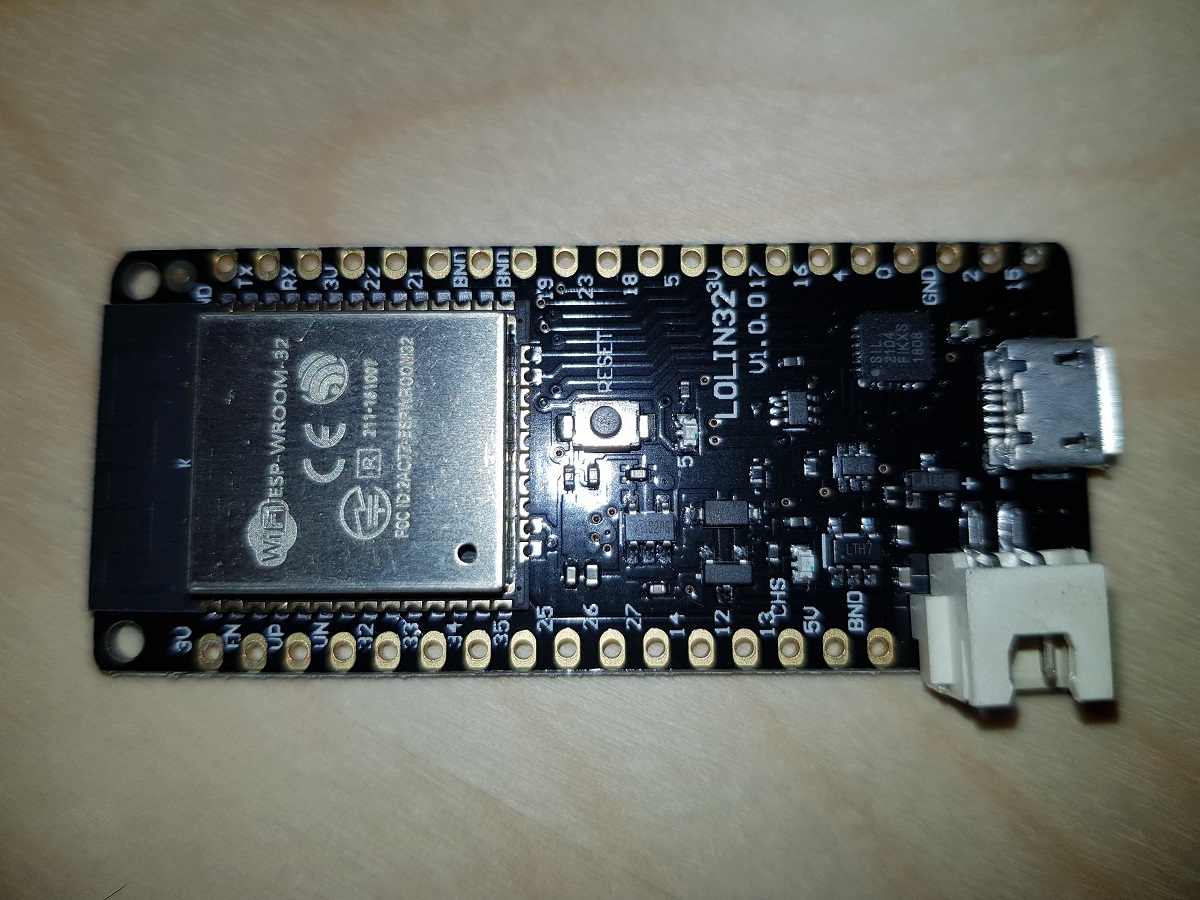
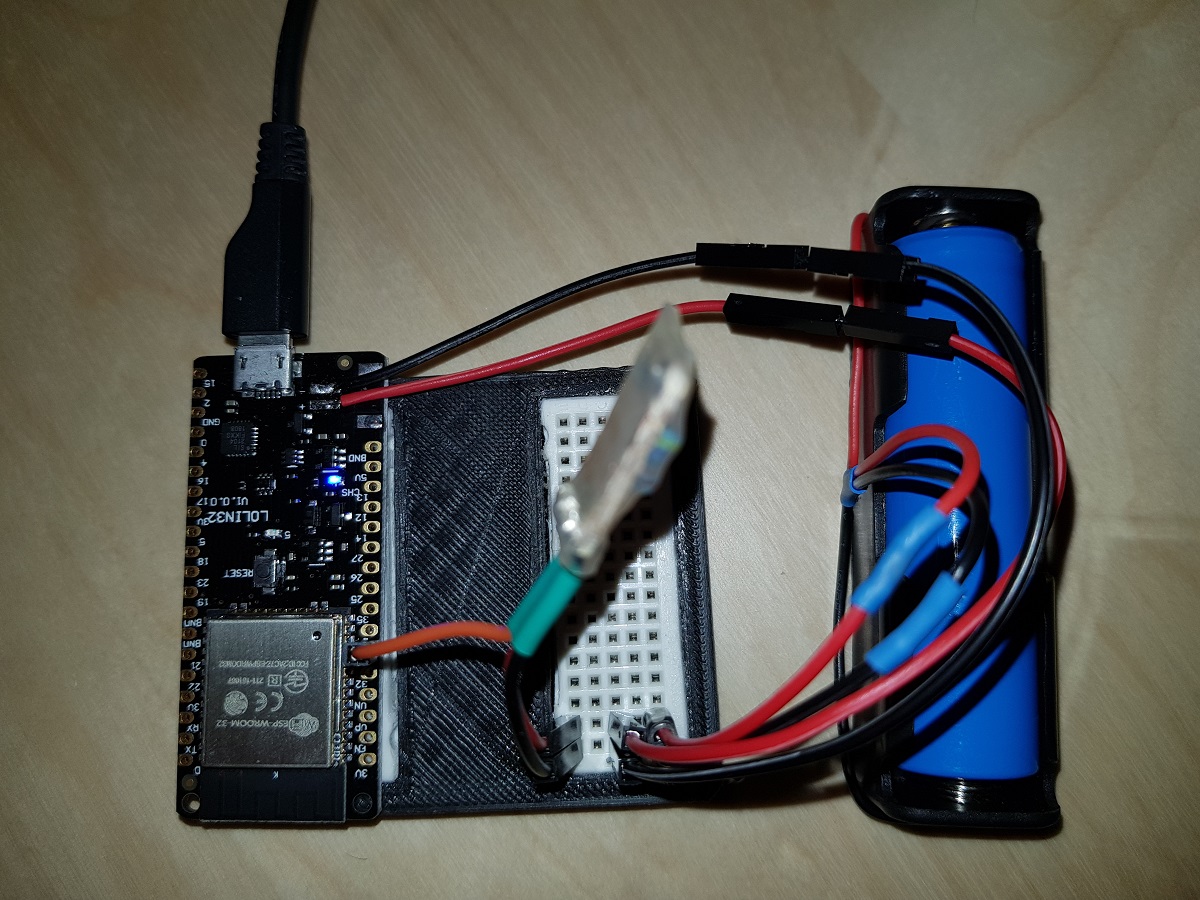
Some of the ESP32 development boards provide a 3.7 Ion-Li battery charger what is an advantage when we want to get a device with the minimum number of components.
One of these boards is Wemos Lolin 32 (with battery charger) which costs about 7$ in eBay.
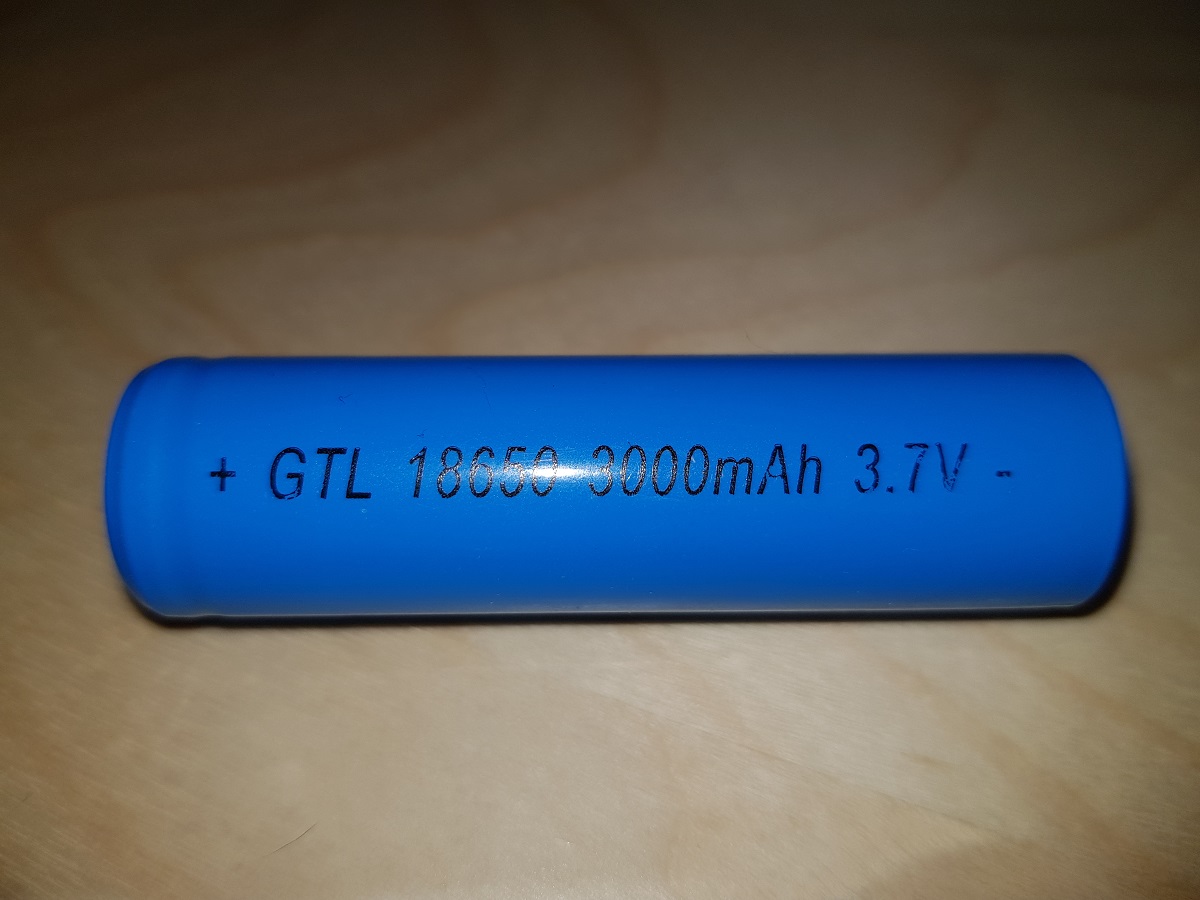
When a battery is plugged in and the board is connected to a power source via the USB connector, the battery starts being charged.
As the ESP32 board counts with several ADC pins, we can use one of them to check the voltage in between the two battery terminals. The only issue with this is that ADC pins expect voltages between 0 and 3.3 volts and our Ion-Li battery voltage range may reach 4.2 volts.
The solution to that is connecting a voltage divider to the battery, so we can divide the volts by 2 and the maximum value will be about 2.1 volts.
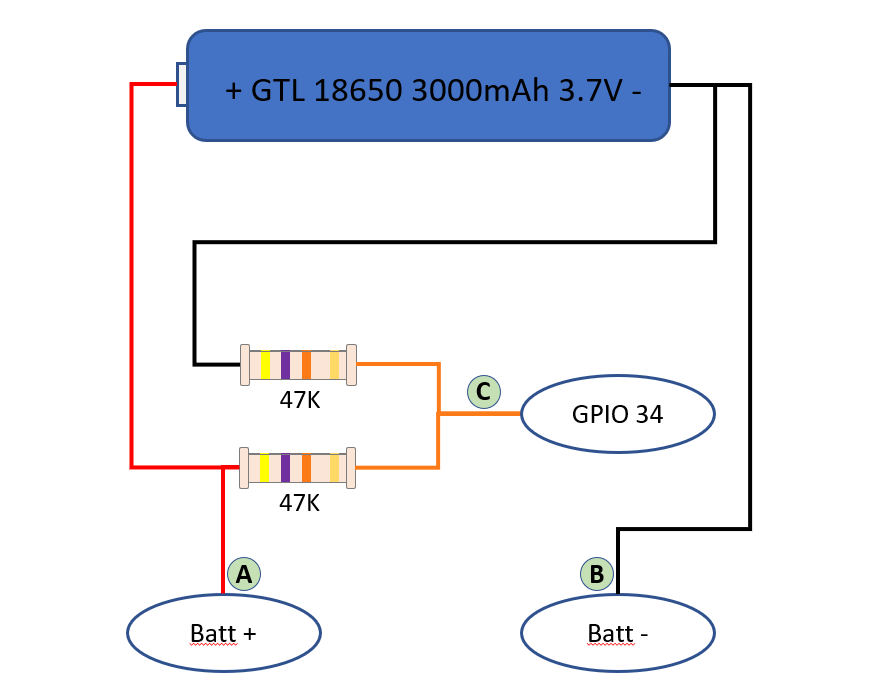

Our voltage divider is built of two 47KΩ resistors. The total impedance between positive and negative terminals will be 94KΩ and that means a current of less than 5 50μA (microamperes, not milliamperes). (Thanks Jonathan)
With this, we can measure the voltage applied in GPIO34 (or any other ADC pins of our ESP32) and then, based on a conversion table, calculate the charge level of the battery.
First, we will get the value of ADC pin. This value may vary from 0 to 4096 depending on the voltage applied to it from 0V to 3.3V. So we can establish a constant to calculate the voltage applied to the pin based on its value. This constant, theoretically, will be 3300 / 4096 = 0.8056.
As we are applying a voltage divider and the voltage applied to the pin is half the voltage of the battery, our constant should be 0.8056 x 2 = 1.6113.
This means, for each unit in ADC pin we have 1.6113 mVolts applied to it.
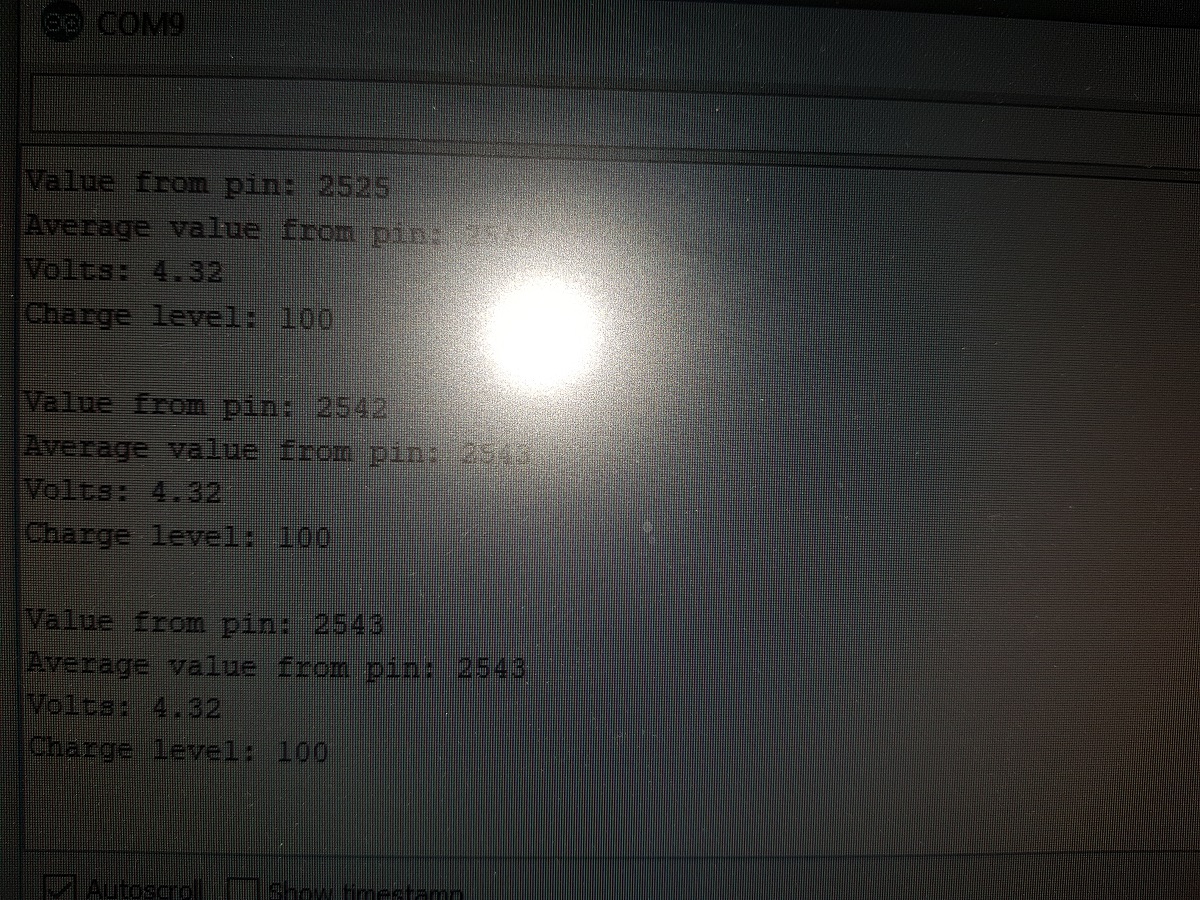
For instance, if we read the value of the ADC pin and get 2,543, then the voltage applied to the pin should be 2,453 x 1.6113 = 3,952V = 3.95V
ADC pins are not that precise, so the value of our constant should be adjusted to a level we consider it is valid for our components. In my case, after doing some testings I have concluded that the best value for the conversion factor is 1.7.
As I mentioned before, calculating the charge level is a direct translation from the voltage we obtained to a charge level by using a table.
All the code to make these calculations is contained in a library I have created for that purpose. You can find it in Github at Pangodream_18650CL.
All you have to do is downloading the .zip file and add it to Arduino IDE.
There is an example of using the library:
#include <Pangodream_18650_CL.h>

//#define ADC_PIN 34
//#define CONV_FACTOR 1.7
//#define READS 20

Pangodream_18650_CL BL;
/**
 * If you need to change default values you can use it as
 * Pangodream_18650_CL BL(ADC_PIN, CONV_FACTOR, READS);
 */

void setup() {
  Serial.begin(115200);
}

void loop() {
  Serial.print("Value from pin: ");
  Serial.println(analogRead(34));
  Serial.print("Average value from pin: ");
  Serial.println(BL.pinRead());
  Serial.print("Volts: ");
  Serial.println(BL.getBatteryVolts());
  Serial.print("Charge level: ");
  Serial.println(BL.getBatteryChargeLevel());
  Serial.println("");
  delay(1000);
}
And if everything works, it should display something like this on your serial terminal: