
If you own a Creality Ender 3 and want to deploy Marlin on it you should first ask yourself why.
Why
When searching Google for that topic, a bunch of results and video tutorials appear in front of you talking about the ‘benefits’ of that ‘improvement’. Well, if you read the details you will find comments like Ender 3 is a great 3D printer but comes with some defects and the new version of Marlin is the solution to that. But seriously, what are those defects?
I bought the printer 3 weeks ago and I have to say that the results are impressive. Ok, it is my first 3D printer, but before acquiring it I was reading a lot about the subject and the most common advice in every web I visited was: don’t get frustrated about the results of 3D printing? You will get a lot of bad results and that’s normal. I’ve got too few bad results with my Ender 3… until yesterday.

After reading and watching some tutorials I decided to install a bootloader on my printer to upload the latest Marlin version to it. Why? I still don’t know.
Burning the Bootloader
It wasn’t easy. I look for some old Arduinos I knew I had and found a Duemilanove and a Mega. The board used by Creality in it’s Ender 3 is compatible with ATMega Sanguino boards, so all you have to do is burn the bootloader on the board and then use Arduino IDE to upload the sketch with the latest Marlin version.
Burning the bootloader has to be done with an ISP programmer or using an Arduino as ISP. The procedure is quite simple:
- Open the board box of your Ender 3
- Locate the ICSP connector
- Use five Dupont Female to Female wires to connect:
- GND to GND
- 5V (VCC) to 5V(VCC)
- SCK to SCK
- MOSI to MOSI
- MISO to MISO
- Use one Dupont Female to Male wire to connect:
- RESET to IO10 of your Arduino board
- Upload Arduino ISP sketch to your Arduino (in examples)
- Change board to Sanguino and Programmer to Arduino as ISP
- Burn Bootloader
I can’t remember how many times I tried. Changing port, reviewing wires many times, switching on / off, using Duemilanove and Mega… and nothing worked. I got the same error always and it seemed there was a problem getting synchronism in Avrdude tool.
Arduino’s ISP issue and the capacitor workaround
Then I remembered I had this problem years ago when playing with Arduinos. First Arduino models had problems with reset while negotiating ISP programming and the workaround is using a 10μF electrolytic capacitor between reset and GND pins.
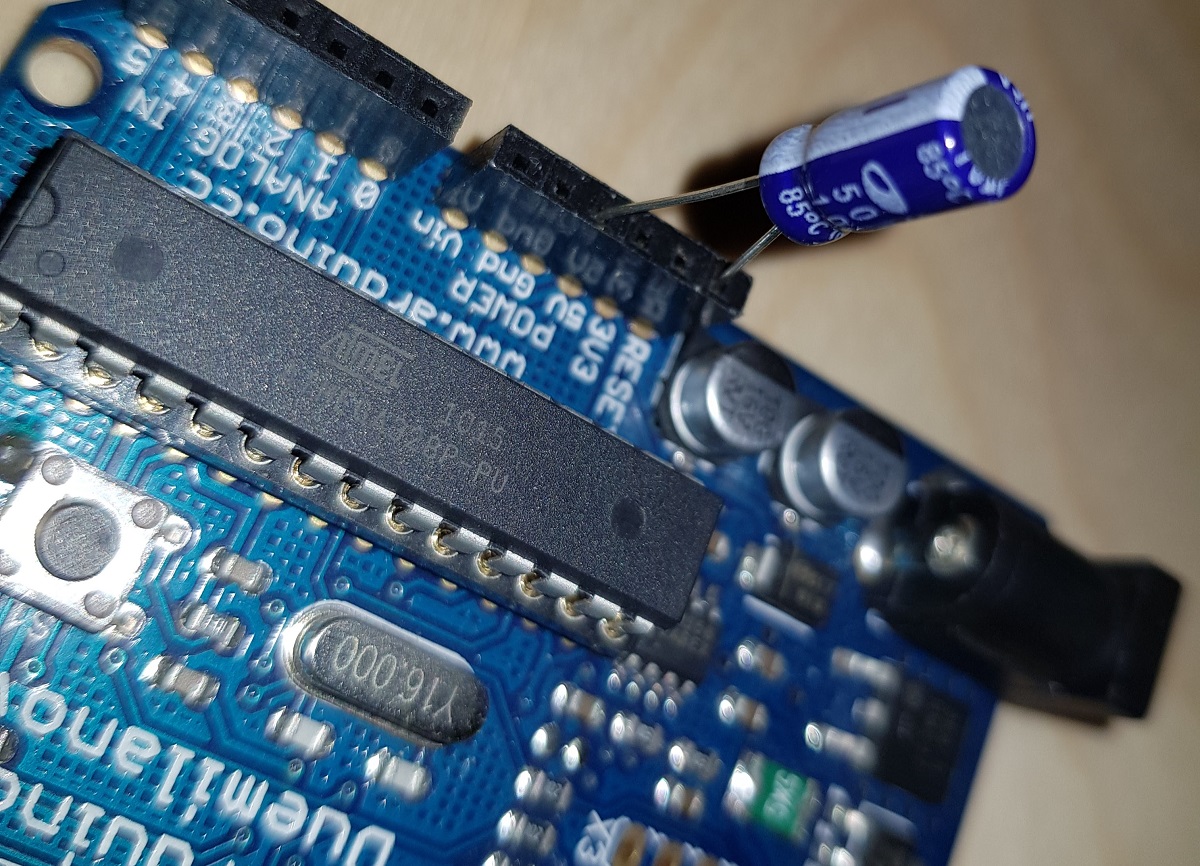
Remember electrolytic capacitors have polarity and you shouldn’t reverse them:
After plugin the capacitor I was able to burn the uploader.
Uploading Marlin latest and ‘improved’ version
As expected, the printer was now reset. No printing program inside it and a blank LCD screen showing nothing.
That is the moment to upload Marlin latest software using Arduino IDE.
My intention is not telling you all the steps to do this, as the Internet is full of videos and tutorials (and remember, I don’t recommend doing it), but telling you what happened to my printer after doing that.
I uploaded the latest Marlin software with some miracle customizations performed in the parameters code by an expert guy. The result? After leveling the bed I tried with a small box and…
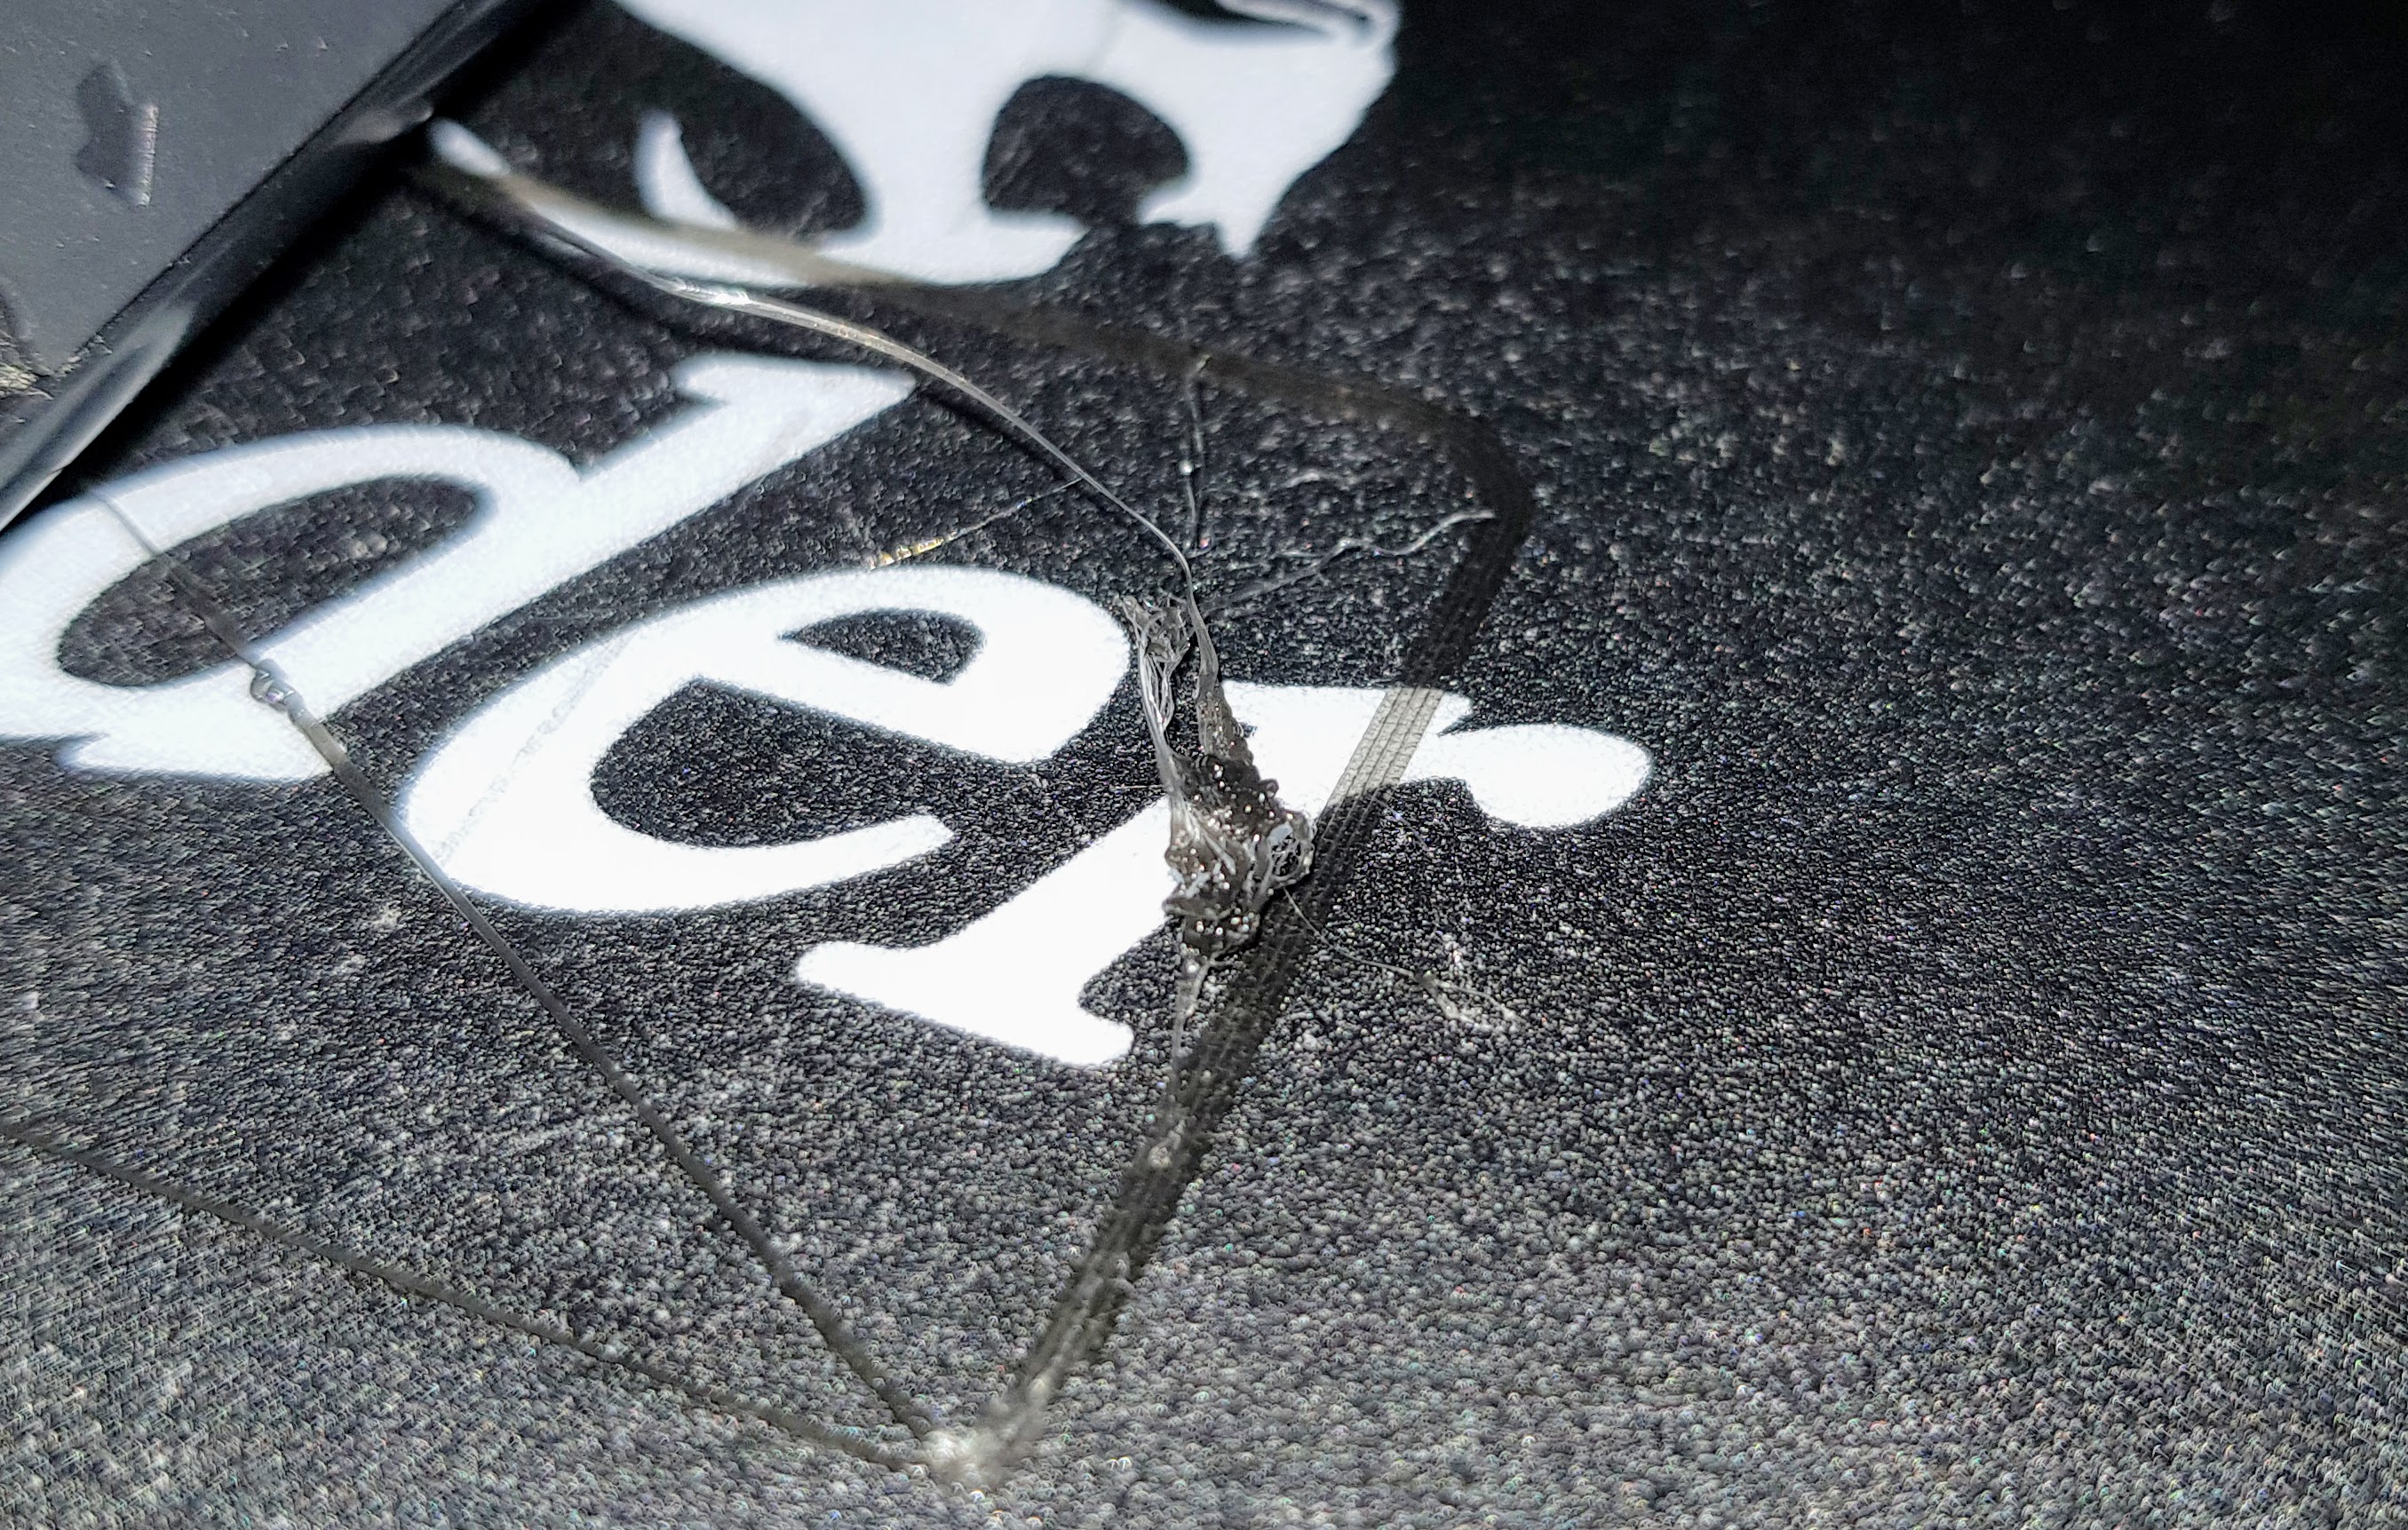
That was the first time in three weeks. Before that, the adhesion was very good. I tried some more times, I calibrated and leveled the bed and always the same result. I found that when the nozzle never got enough close to the plate. Maybe the miraculous customizations?.
I decided then to go back to the Creality version, which is a previous Marlin version adapted for Ender 3.
Creality Ender 3: Going back to manufacturer version
The good news is that we can now upload code to our printer because we have deployed a bootloader on it.
All we have to do is to find the manufacturer’s original code.
Go to manufacturer’s download page and find Ender 3 model
Click on Download button and save the .rar file
Extract the .rar file in a folder.
Locate the Marlin folder inside the folders created by the Unrar tool.
Copy the Marlin folder to a better location and edit the Configuration.h file.
Change the language for display. Locate the line (line #1188 in my version)
#define LCD_LANGUAGE cn
and replace cn with your language code (en, de, es, it, fr, …)
Compile and upload to the printer port detected when plugged in.
Remember you have to set these options in Tools menu:
Board: Sanguino
Processor: ATmega1284 or ATmega1284P (16MHz)
Port: The one detected by your machine.
Programmer: AVRISP mkll
Conclusion
I think it isn’t worthy of it deploying the latest Marlin version on your Ender 3, mainly because you are not going to get a lot of improvements.
In the other hand, it is very interesting having a bootloader installed and the capability of loading the code into the printer, but only if you need to customize the code.
Thanks for sharing, it makes me more aware about it.
Well written!
I pretty much went through the same swamp like you did, except for the success at the end. The steps taken were the same, but now my screen is blank. Obviously I failed to upload the new version on it.
The Bootloader seems to work, since I can see it with my Arduino IDE.
I also I can upload stuff and it tells me that it was successfully uploaded.
But still a blank screen.
Any suggestions on that?
Cheers.
make sure you are using the stock cr10 display in configuration.h for screen using only 1x10way idc as on the board.
thank you for sharing
Thank you for commenting. 🙂
nice post… thanks for sharing
Bruh…I only have 4 pins on my creality 3 v4.2.2 motherboard…what should I do ?