If you are reading this I guess you know what Composer and Packagist are and probably you need to know how to build your own package or you just simply don’t remember all the steps to do it.
Otherwise, you can get some very basic info of Composer here: Wikipedia Composer and if you want to dive into the documentation then you can visit Composer Documentation page. Packagist is the main repository for Composer packages.
Preparation
We will create a package and before writing a line of code, we will compile some basic information. I’m using mine as an example.
- Developer name / Organization: pangodream
- Package name: str-util
- Description: A very simple package
Setting up the project for the package
Create the project folder
In our case, the project folder will be str-util
Create two more folders inside the project one; one for the package code and the other one for testing. The folder structure should be:
str-util
    /src
    /test
Create composer.json file
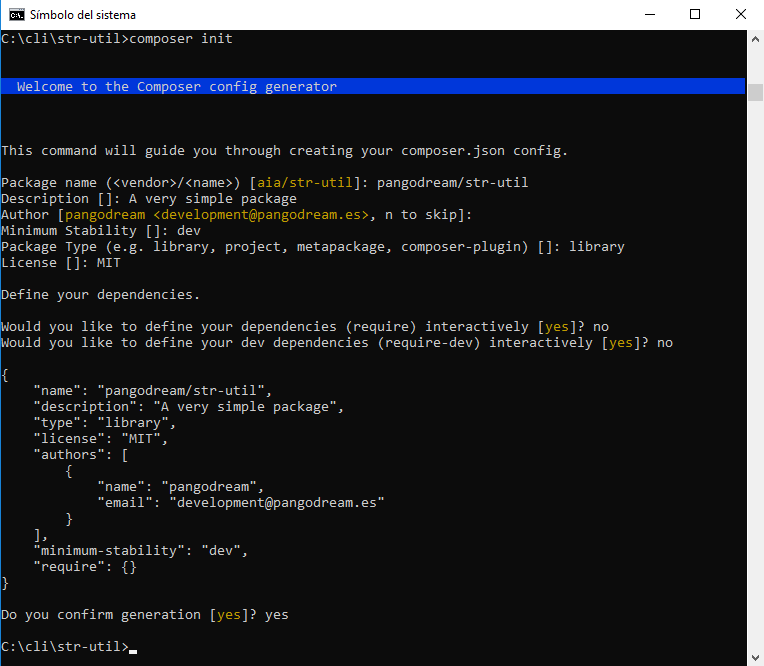
Access the project folder and create composer.json by typing
> composer init
Composer will try to guess some of the configuration values
Once we confirm the file generation, a composer.json file will be in our project folder and it will contain some very similar to this:
{
    "name": "pangodream/str-util",
    "description": "A very simple package",
    "type": "library",
    "license": "MIT",
    "authors": [
        {
            "name": "pangodream",
            "email": "development@pangodream.es"
        }
    ],
    "minimum-stability": "dev",
    "require": {}
}
So, this is now the content of our project folder:
str-util
    composer.json
    /src
    /test
Edit to complete composer.json
We will add some information about autoloading (“autoload”) and also tell composer our dependencies (“require”). For instance, which is the minimum version of PHP that our library needs to work.
{
    "name": "pangodream/str-util",
    "description": "A very simple package",
    "type": "library",
    "license": "MIT",
    "authors": [
        {
            "name": "pangodream",
            "email": "development@pangodream.es"
        }
    ],
    "minimum-stability": "dev",
    "autoload": {
        "psr-0": {
             "StrUtil": "src/"
         }
    },
    "require": {
        "php": ">=7.0.0"
    }
 }
Install composer autoloader
Now we will tell Composer to install autoloader and its code. Like any other vendor, Composer will deploy its own files inside the vendor folder.
> composer install
Loading composer repositories with package information
Updating dependencies (including require-dev)
Nothing to install or update
Writing lock file
Generating autoload files
Now, the content of the folder is
str-util
    /composer.json
    /composer.lock
    /src
    /test
    /vendor
        /autoload.php
        /composer
            /autoload_classmap.php
            /autoload_namespaces.php
            /autoload_psr4.php
            /autoload_real.php
            /autoload_static.php
            /ClassLoader.php
            /installed.json
            /LICENSE
Write down our package code
Inside the composer.json file, we told composer the path were StrUtil package classes are. So, each time we reference in our code a class qualified with its package name Composer will look into the composer.json file to know where that class file is.
In our case, the package name is StrUtil and the class is Counter (because our class will contain some methods to count words, paragraphs, letters, …).
Inside src folder, let’s create a new folder for our package with the name we gave it inside composer.json: StrUtil, and inside that folder, we will place one of our package classes file. Now, we have this folder hierarchy
/str-util
    /src
        /StrUtil
            /Counter.php
So, when PHP finds a reference to a class with the ‘use’, it will look into composer.json. For instance, let’s say we have a line of code like this
use StrUtil\Counter;
What composer.json file indicates is that StrUtil package is under src folder
"autoload": {
        "psr-0": {
            "StrUtil": "src/"
        }
    }
So, the Counter.php file containing the Counter class code should be located in
src/StrUtil/Counter.php
Now we know how the class file is located and loaded, let’s write down the code:
<?php
/**
 * Created by Pangodream.
 * Date: 14/04/2019
 * Time: 18:50
 */

namespace StrUtil;


class Counter
{
    /**
     * @param string $text The text we want to count the number of words it consist of
     * @return int The number of words in text
     */
    public static function countWords(string $text){
        /** @var int $count To store the result of counting words in text */
        $count = 0;
        //Clean up the string
        $text = trim($text);
        /** @var array $words Array containing the words */
        $words = explode(" ", $text);
        //Array size is the number of words in text
        $count = sizeof($words);
        return $count;
    }
}
And now we know how to reference that class, let’s create a test file to verify that our class works. We will name this file testStrUtil.php and save it inside the test folder we created before:
str-util
    /test
        /testStrUtil.php
<?php
/**
 * Created by Pangodream.
 * Date: 14/04/2019
 * Time: 19:03
 */

//Use composer autoload to load class files
require_once __DIR__ . "/../vendor/autoload.php";

//Required package/libraries
use StrUtil\Counter;

$text = "Aequam memento rebus in arduis servare mentem";
$wordCount = Counter::countWords($text);
echo "The txt contains ".$wordCount." word(s)\r\n";
Testing our package
From the str-util folder, we are going to invoke the test PHP file and see what happens:
str-util> php test/testStrUtil.php
The text contains 7 word(s)
Our package containing only a class is working and now we are ready to publish it.
Repository part: github.com
The next thing we’ll do is creating a new repository with our GitHub account.
Create the repository at github.com
Go to github.com and create a new repository called str-util. It is a good practice to give a repository description and also initialize with a README file. Because you are going to share the package in packagist.org you need to Add a license file, in our case an MIT License.
Add package files to the repository
Now we will make an initial commit to our repository with the files we already have created inside the src folder.
From the str-util folder, execute the following commands:
---->str-util> git init
Initialized empty Git repository in C:/cli/str-util/.git/

---->str-util> git add src
---->str-util> git add composer.json

---->str-util> git commit -m "Initial commit"
[master (root-commit) af7bbac] Initial commit
 2 file changed, 28 insertions(+)
 create mode 100644 src/StrUtil/Counter.php
 create mode 100644 composer.json

---->str-util> git remote add origin https://github.com/YOUR_USER_NAME/str-util.git

---->str-util> git pull origin master --allow-unrelated-histories
From https://github.com/YOUR_USER_NAME/str-util
 * branch            master     -> FETCH_HEAD
Merge made by the 'recursive' strategy.
 README.md | 2 ++
 1 file changed, 2 insertions(+)
 create mode 100644 README.md

---->str-util> git push origin master
fatal: HttpRequestException encountered.
   Error al enviar la solicitud.
Username for 'https://github.com': YOUR_USER_NAME
Password for 'https://YOUR_USER_NAME@github.com':
Counting objects: 7, done.
Delta compression using up to 4 threads.
Compressing objects: 100% (4/4), done.
Writing objects: 100% (7/7), 928 bytes | 309.00 KiB/s, done.
Total 7 (delta 0), reused 0 (delta 0)
To https://github.com/YOUR_USER_NAME/str-util.git
   16f9ce1..8f91cfa  master -> master
Let’s analyze what we have done:
git init
Initialize the Git repository in our local directory. Git will create its hidden files to control operations made on the repository.
git add src

git add composer.json
We are telling Git which files we want to add to the repository. In our case only the src folder and the composer.json file will be synchronized, the rest of the files will stay only in our local machine.
git commit -m "Initial commit"
Our first Initial commit to our local instance of the repository. We haven’t sent anything to github.com until now.
Now we will add an origin (origin means remote repository) to our local repository. This is the reference to our github.com repository. Replace YOUR_USER_NAME with your own Github user name.
git remote add origin https://github.com/YOUR_USER_NAME/str-util.git
If at this point we try to push (send to remote) the commit we made locally, an error will occur because in the remote instance of the repository there are files that don’t exist locally (README file for instance). We cannot send and receive at the same time under normal circumstances, so we will first pull files from origin ignoring possible conflicts:
git pull origin master --allow-unrelated-histories
Now, the README file is in our local repository as well. Now, we can push the commit we made before without any conflicts.
git push origin master
If we take a look to our Github repository, a new folder src should be created and inside it a file named Counter.php
Publishing part: packagist.org
If everything went right, our package is available at Github and ready to be published on Packagist.
Log with your credentials (or using Github) into Packagist.
On the upper right corner, you will find a Submit button. Click on it and a new screen, titled “Submit package” will open.
Copy the URL of your Github repository and paste it inside the text box under “Repository URL (Git/Svn/Hg)”. Your URL should be something like this
https://github.com/YOUR_USER_NAME/str-util
Now press the big green button Check and if our package is OK, the button caption will change to Submit.
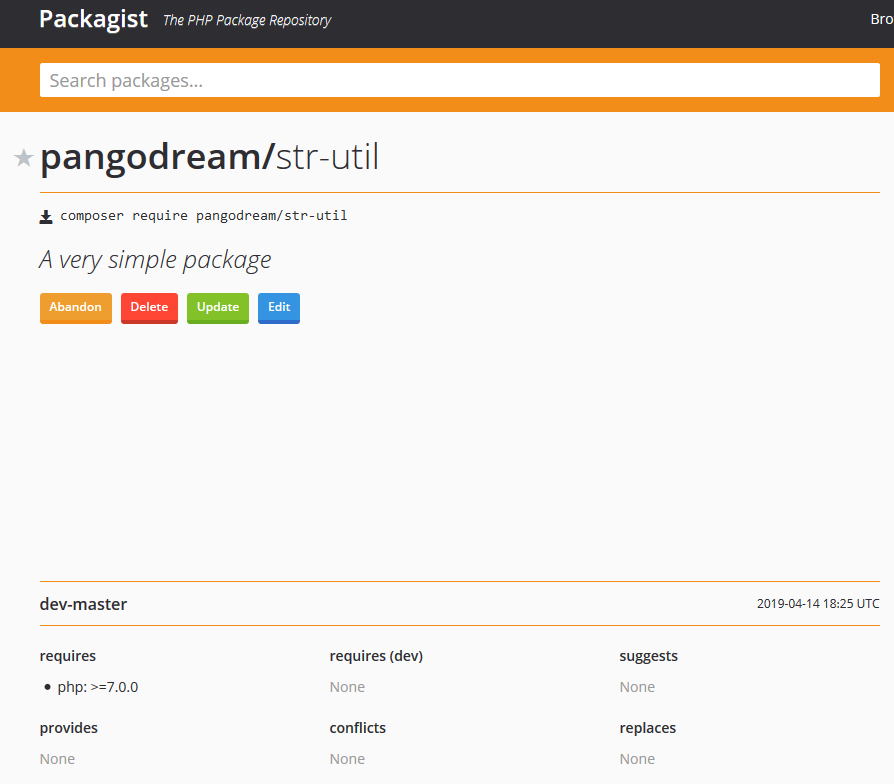
Press the Submit button and a new screen, showing the results will appear.

Now you have a new package published in Packagist and anyone who wants to use it only has to type in its project folder:
composer require YOUR_USER_NAME/str-util
In a separate post, we will see how to include our new package in a project and invoke the test function we have created.

